Showing posts with label original recipes. Show all posts

Wednesday, October 3, 2012

Chocolate Oreo Cake Pops


Another original cake pop recipe!

And these aren't just any Oreo pops - they're Oreo cake pops.  Which means no, it's not just crushed Oreos and cream cheese dipped in white chocolate.  It's chocolate cake with Oreo frosting dipped in white chocolate and more Oreos.

You just got awesome'd.

These are rather like those Chocolate Peppermint Cake Pops from way back when, but, you know, Oreo! :D

Enjoy!

Chocolate Oreo Cake Pops
REQUIRES SOFTENED BUTTER
REQUIRES ROOM TEMPERATURE EGGS AND MILK
REQUIRES COOLING TIME (1-2 hours/overnight)
REQUIRES CHILLING TIME (3-4 hours/overnight)

Makes 40-60 cake pops, depending on pop size

Chocolate Cake:
2 1/2 cups flour (spooned and leveled)
1 cup unsweetened cocoa powder
1 teaspoon baking soda
2 teaspoons baking powder
1/2 teaspoon salt
2 sticks butter, softened
2 cups sugar
3 eggs, room temperature
1 teaspoon vanilla
1 1/2 cups milk, room temperature
  1. Preheat oven to 350 degrees F.  Grease and flour a 9x13-inch cake pan.
  2. In a large bowl, whisk flour, cocoa, baking soda, baking powder, and salt.  Set aside.
  3. In another large bowl, cream butter and sugar until light and fluffy.  Add eggs one at a time, mixing until just combined and scraping down the sights of the bowl after each addition.  Add vanilla and mix well.
  4. Add flour mixture a third at a time, alternating with milk in two additions: flour, milk, flour, milk, flour.
  5. Spread batter evenly into prepared pan.  Bake 35-40 minutes or until a toothpick inserted in the center comes out clean.
  6. Let cake cool completely (overnight works best) before crumbling.
Oreo Frosting:
1 1/2 sticks butter, softened
1 teaspoon vanilla
3 cups powdered sugar
1-2 teaspoons milk, if needed
3/4 cup crushed Oreos (there should still be chunks!)
  1. In a large bowl, beat together softened butter and vanilla until combined.
  2. Mix in powdered sugar, one cup at a time, stirring well after each addition.
  3. Add milk if necessary to make the frosting more creamy.
  4. Add crushed Oreos and stir gently.
Assembly:
1 cup FINELY crushed Oreos
1-2 bags Target white chips
40-60 lollipop sticks
Oil
Styrofoam block with holes for pops
  1. Crumble the cake into a large bowl.  Add frosting and stir gently with a wooden spoon until the mixture is fairly even.
  2. Form into cake balls.  Place balls on a cookie sheet covered with wax paper and cover with plastic wrap.  Refrigerate overnight or until firm.
  3. Place crushed Oreos in a wide and shallow bowl.
  4. Place a metal bowl over a saucepan of water and heat; make sure the water doesn't touch the other side of the bowl.  Drop in a few white chips - when they have melted you are ready to begin.
  5. Pour a small amount of oil in the bottom of the bowl and pour in some white chips.  Let melt and stir smooth.  TURN OFF THE HEAT.
  6. Dip lollipop sticks into melted white chips and then press into cake balls.  Refrigerate while you dip the rest of the sticks.
  7. Dip pops completely in melted white chocolate, brushing off excess with a toothpick.  Immediately roll in finely crushed Oreos and stand in styrofoam block.  Make finished cake pops one at a time - white chocolate will set up quickly.
  8. Continue dipping and rolling.  If more white chocolate is needed, turn on heat, add more oil, and add more chips.  Turn off heat once it has melted and continue to dip.
  9. Let pops harden completely before taking them anywhere or serving them.  They may be refrigerated, tightly covered, for up to 3 days, and frozen, tightly covered, for about 2 weeks.

So, let's break it down:
Make that beautiful chocolate cake.
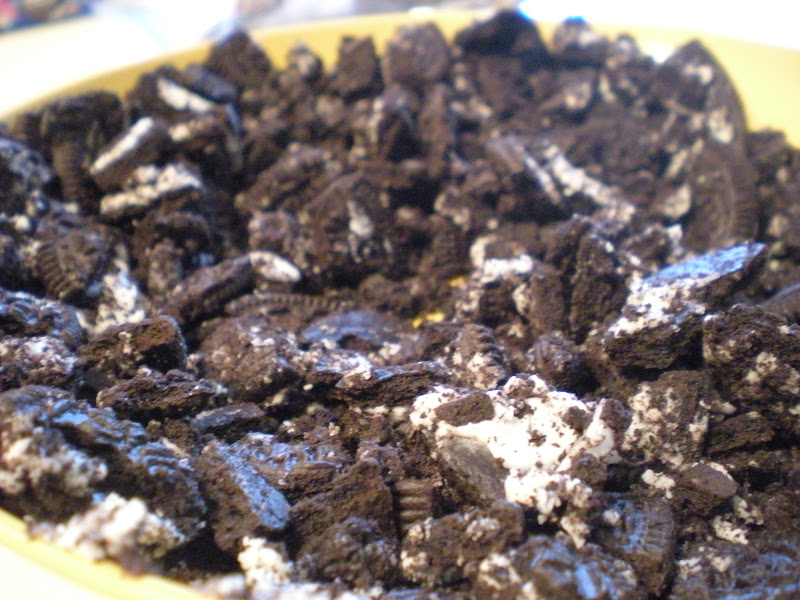
Crush your Oreos!  You'll want chunks for the frosting, and finely crushed Oreos for rolling the cake pops.
Make the frosting...
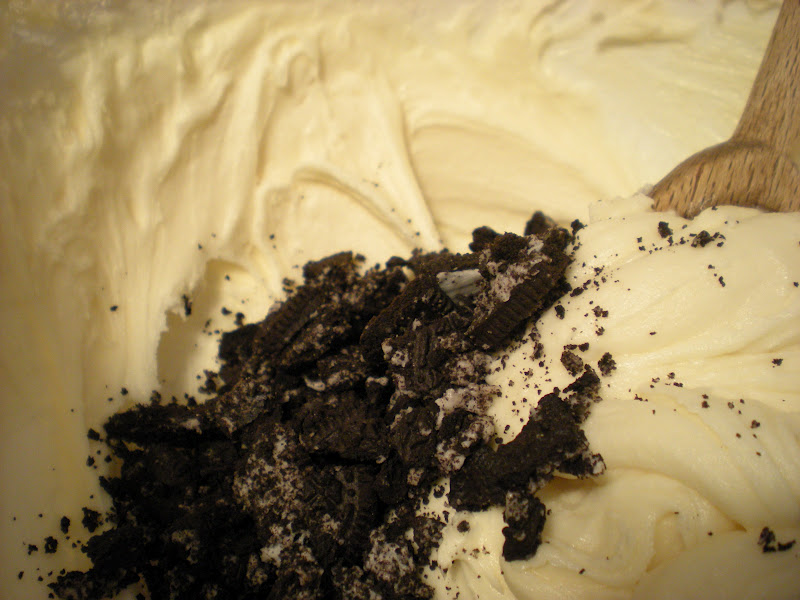
Add Oreo chunks/crumbs...
And combine with your crumbled cake!
Form into balls and refrigerate.
Then just dip, roll, and let harden!  Enjoy these!
They taste great chilled, also - and I'm sure milk won't mind being drunk with its favorite cookie in cake pop form! ;)
-JJ

Saturday, September 8, 2012

House Cake Pops


Talk about a housewarming gift!


Original recipes for the win! :3

And yes, I did bring these to my friend's new home.  She moved away :( but I still keep in touch with her.

Anyhoo, if you knew me, you'd know that I jump at every chance to make cake pops.  Every chance - whether it be Christmas, St. Patrick's Day, or for my own parties.

And here are the results of another chance: house cake pops.

Okay, yeah, they do look like birdhouses.  They look a lot like birdhouses - because they're on sticks.  I hadn't thought of that before I'd already dipped all of the pops.  But, whatever.  If you try making these, you could just make them house cake balls and stick them in green/floral/whatever mini cupcake wrappers.

I am quite proud of these, actually.  I do declare my cake pop making and decorating skills are improving.  I probably messed up only one of these.  And then promptly ate it.

In case you're new to the cake pop making world, then I'll post the actual yellow cake and vanilla frosting recipes I use.  They are my go-to recipes, and work wonderfully - figures, they're from Bakerella!

True, they're both included in my cupcakes post, but now, in future cake pop posts, I can just link back here! ^_^

Now, without further ado, I will present you with the original recipe - and then go into a fairly detailed breakdown:

House Cake Pops
REQUIRES SOFTENED BUTTER
REQUIRES ROOM TEMPERATURE EGGS AND MILK
REQUIRES COOLING TIME (1-2 hours/overnight)
REQUIRES CHILLING TIME (3-4 hours/overnight)

Makes 40 cake pops

Cake:
3 cups flour
2 teaspoons baking powder
1/2 teaspoon salt
2 sticks unsalted butter, softened
2 cups sugar
4 eggs, room temperature
2 teaspoons vanilla
1 cup milk, room temperature
  1. Preheat oven to 350 degrees F. and grease a 9x13 inch pan.
  2. In a large bowl, whisk together flour, baking powder, and salt.
  3. In a separate large bowl, cream softened butter and sugar.  Add eggs, one at a time, stirring well after each addition.  Add vanilla and combine.
  4. Alternatively add flour mixture and milk, in this order: 1/3 flour mixture, 1/2 milk, flour, milk, flour.
  5. Spread into prepared pan and bake 35-40 minutes or until a toothpick inserted in the center comes out clean.  Let cool completely - this often takes overnight.
Frosting:
1 1/2 sticks butter, softened
1 teaspoon vanilla
3 cups powdered sugar
1-2 teaspoons milk, if needed
  1. In a large bowl, beat together softened butter and vanilla until combined.
  2. Mix in powdered sugar, one cup at a time, stirring well after each addition.
  3. Add milk if necessary to make the frosting more creamy.
Assembly:
10 full graham cracker sheets
1 Hershey's milk chocolate bar
1-2 bags Target white chips
40 lollipop sticks
Oil
Styrofoam block with holes for pops
  1. If there are any brown edges to your cake, cut them off.  Then crumble the remaining yellow cake into a large bowl.  Add frosting and stir gently with a wooden spoon until the mixture is fairly even.
  2. Form into 40 cake cubes, method demonstrated here.  Use remaining mixture to create 40 triangular prisms, pictured below.  Place triangular prisms on cubes, pressing slightly.  Place house cubes on a cookie sheet covered with wax paper and cover with plastic wrap.  Refrigerate overnight or until firm.
  3. Break graham cracker sheets into four sections, and break each section in half.
  4. Take 10 sections of a Hershey bar and cut into four pieces.
  5. Place a metal bowl over a saucepan of water and heat; make sure the water doesn't touch the other side of the bowl.  Drop in a few white chips - when they have melted you are ready to begin.
  6. Pour a small amount of oil in the bottom of the bowl and pour in some white chips.  Let melt and stir smooth.  TURN OFF THE HEAT.
  7. Dip lollipop sticks into melted white chips and then into the bottoms of the house cubes.  Refrigerate while you dip the rest of the sticks.
  8. Dip pops completely in melted white chocolate, brushing off excess with a toothpick.  Immediately stand in styrofoam block and add 2 graham cracker pieces to the roof and 1 Hershey's piece as a door.  Make finished cake pops one at a time - white chocolate will set up quickly.
  9. Continue dipping and decorating.  If more white chocolate is needed, turn on heat, add more oil, and add more chips.  Turn off heat once it has melted and continue to dip.
  10. Let pops harden completely before taking them anywhere or serving them.  They may be refrigerated, tightly covered, for up to 3 days, and frozen, tightly covered, for about 2 weeks.
Breaking it down:
So your house cubes will look like this.  You need the little prism-thingies so that the graham cracker roofs can go on easily.  They're pretty easy to form, but it did take me a few tries to get it right.  Just try to make them look like this:
And here are your graham cracker roofs.  IMPORTANT TIP: With your fingernail, try indenting where you want to break the graham cracker fourths in half.  They'll break much easier and you won't have to scrap (or eat xD) as many graham crackers that way.  You want 80 of these by the time you're done.
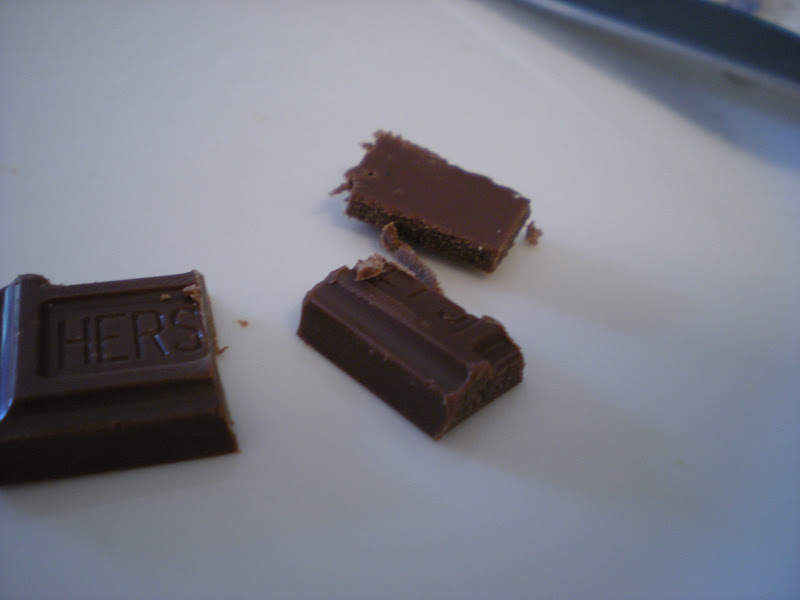
Now, on to the Hershey's bar.  Just cut the sections with a table knife.
In half...
And then in fourths - long ways.  So NOT like [][][][].  Those doors are too skinny then!  In half vertical, and then in half horizontal.
And make 40 of those.
Then dip your pops.  If you need help dipping, see my dice cake pops post.
Don't they look adorable when they're done!?
And if you want to make a display - I used styrofoam, green tissue paper, and black duct tape.  The other decorations are foam shapes glued on or toothpicked.
Have fun making these!
-JJ

Saturday, July 14, 2012

Kris' Macaroni Salad

This is a recipe, like the pickle wraps, that I learned from my godmother, Kris.  And, just like the pickle wraps, this recipe is very simple.  And somehow I've found a way to make it even more simple than usual.

See, I didn't have any gherkins.  (By the way, I love gherkins, so this is a really big deal.)

But I did have a jar of relish.  Relish=cut up pickles.  See where I'm going with this?

So really, you can use chopped gherkins or relish - the macaroni salad comes out pretty much the same either way.  If you happen to love gherkins, like moi, then you will notice the difference if you use relish, but it's kind of a good difference.  For lacking gherkins, anyway.

Sorry, I'm really using the word "gherkins" way too much.  I just love typing it.  Gherkins.  Lol!

Kris' Macaroni Salad
1 cup finely chopped green olives (approximately 1 jar)
1 cup finely chopped sweet gherkins OR pickle relish
1 cup Miracle Whip**
  1. Cook the noodles according to the directions on the box, omitting the salt.  Once cooked, place in a large bowl.
  2. With a wooden spoon, combine noodles with chopped olives and chopped gherkins or relish.
  3. Add Miracle Whip and stir until evenly combined.  Taste.  Add more Miracle Whip if necessary. Store covered in refrigerator.
*The only place I've found these noodles is in Minnesota.  If you can't find them where you live, you can use regular ring noodles, but the texture won't be right.
**This HAS to be Miracle Whip.  No mayo.  NONE.

Breaking it down:
Cook your lovely ring noodles.
Chop olives like this:
The chopped gherkins should be about the same size.  Or you can use relish.  Anyway, combine the pickles and the olives and the noodles...
Add Miracle Whip and don't even THINK about using mayo instead...
And give it several good stirs.
There you have it!  A really yummy macaroni salad, perfect to eat with hamburgers or hot dogs or anytime during the summer.
Or anytime at all, really. ;)
-JJ

Saturday, June 30, 2012

Ultimate Chocolate Chip Cookie Dough Cake

Before I say anything, I must say this: this is one heckuva post.

Meaning, it's really long.  And yes, I'm going to talk a lot.

So I'm taking a week off.  Literally, I am going to Minnesota.  Wayyy up north, up there by Canada.  Where the mosquitoes the size of baseballs roam.

Anyway.

I made this glorious cake for my birthday.  No way am I going to let someone else bake my own cake.  THE GLORY IS ALLL MIIIINE!!!

And it is a glorious cake.
A thick, two-layer yellow butter cake...

Frosted with brown sugar frosting...

With a layer of cookie dough balls and frosting in the middle...


And sprinkled with mini chips.

Translation: Fantastic frosted with awesome, filled with amazing, and topped with insanely great.

It is the Ultimate Chocolate Chip Cookie Dough Cake.

Now, there have been several chocolate chip cookie dough cakes.  The one that initially inspired me was the Domestic Rebel's.  But what I ended up modifying was the one from Something Shiny, because it looked so delicious.

Now, you can follow whatever recipes you want, but here's why I chose the ones I did:
1. Cake - I got this recipe from Bakerella, and she is very rarely wrong.  Pretty much never, actually.
2. Frosting - This is the one recommended on Something Shiny.  However, see my note*.
3. Cookie dough - Again, I used the one recommended.  (These can be found at Fake Ginger.)
4. Cookies - I used the recipe that I posted about, from the Repressed Pastry Chef, because I'm so in love with these cookies and I just had to make them.

There, that's done.  And now, a few confessions:

1. This was my first time using butter flavor.  I hadn't even heard of it before, and, frankly, the idea of butter flavor still scares me.  Turns out it's a great way to make you think you're eating more butter than you actually are and send you running on a guilt trip.  Seriously, I think it might have the potential to be a weight-loss aid.

2. This was my first time using self-rising flour.  I know, I know, I'm a baker and I've never used it before.  I probably wouldn't have used it at all except I was sure which conversion from regular flour, salt, and baking powder (or is it soda?) to self-rising flour to use (there are many).

So there.  I've confessed.  And now it's time to drool.

Oh, and fyi, the cake all by itself is now my favorite cake ever. :D

Ultimate Chocolate Chip Cookie Dough Cake
REQUIRES SOFTENED BUTTER
REQUIRES ROOM TEMPERATURE EGGS, MILK
REQUIRES CHILLING TIME

ORDER OF OPERATIONS:
  1. Bake chocolate chip cookies.
  2. Bake cake.
  3. While cake is baking, make cookie dough.
  4. While cookie dough chills, make frosting.

Chocolate Chip Cookies:
See recipe here.

NOTE: Make small cookies and medium cookies to decorate this cake.  Small cookies can be made with a teaspoon-size cookie scoop, while medium cookies can be made with the tablespoon-size.

1-2-3-4 Cake:
2 sticks unsalted butter, softened
2 cups sugar
4 eggs, room temperature
3 cups self-rising flour
1 cup milk, room temperature
1 teaspoon vanilla
1/2 teaspoon butter flavor
  1. Preheat oven to 350 degrees F.  Grease two 9-inch cake pans.
  2. In a large bowl, cream butter until fluffy.  Add sugar and beat well.
  3. Add eggs one at a time, beating well after each addition.
  4. Add flour and milk, alternating and beginning and ending with the flour, and mixing well after each addition.
  5. Add vanilla and butter flavor and combine.
  6. Divide batter equally between the two prepared pans and bake 25-30 minutes.
  7. Cool in pans 5-10 minutes before removing from pans and inverting on wire racks to finish cooling.
"Cookie Dough"**:
1/2 stick unsalted butter, softened
6 tablespoons light brown sugar, packed
1 cup plus 2 tablespoons flour
7 oz. sweetened condensed milk***
1/2 teaspoon vanilla
1/4 cup mini semisweet chocolate chips
  1. In a large bowl, cream butter and sugar until fluffy.
  2. Beat in flour, sweetened condensed milk, and vanilla, beating until smooth after each ingredient.
  3. Stir in mini chips.
  4. Cover and refrigerate 1 hour.
**You could probably use this recipe, as well.  I'm sure there's some slight, subtle difference, but whatever. (I actually recommend using the truffles one.)
***You might consider making a double batch of this since sweetened condensed milk comes in 14 oz. cans.  I had half a can lying around after this, and... you know my fondness for sweetened condensed milk.  NOT GOOD.


Brown Sugar Frosting:
3 sticks unsalted butter, softened
3/4 cup light brown sugar, packed
3 1/2 cups powdered sugar
3/4 teaspoon salt*
3 tablespoons milk
2 1/2 teaspoons vanilla
  1. In a large bowl, beat butter and brown sugar.
  2. Mix in powdered sugar until smooth.
  3. Add salt*, milk, and vanilla.  Mix until smooth.

*When I made this frosting, I found it to be incredibly salty.  I strongly suggest reducing or even completely omitting the salt from this recipe.  Salty caramel - good, salty frosting - baaaad.  You have no idea.

Assembly:
bag of mini chocolate chips
  1. Form chilled cookie dough into balls with cookie scoop and place on a baking sheet/very large plate lined with wax paper.
  2. Place 1/6 frosting in small bowl.  Add 1/2 cookie dough balls and gently toss until cookie dough balls are covered.  Add additional 1/6 frosting and remaining dough balls and gently toss to coat.
  3. Spread dough-ball/frosting mixture on top of one cake with a rubber spatula.  Place other cake on top.
  4. Seal-coat cake with frosting.
  5. Chill 30 minutes in refrigerator or until set.
  6. Frost with remaining frosting.
  7. Place small cookies around the edge of the top of the cake.  Place medium cookies around the bottom of the sides.
  8. Sprinkle remaining space on cake with mini semisweet chocolate chips.
  9. Cover to store.
Take a deep breath.  It's a lot of instructions, and a lot of ingredients, and a lot of work, but it's totally worth it.

My advice: eat it in very small doses.  This cake has the potential to be quite lethal.

Now, breaking it down, thoroughly and slowly:

Cookies:
Make these cookies!  Try not to eat too many!

Cake:
Cream butter and sugar...
Add eggs...
Alternate adding flour...
...and milk...
Add flavorings and mix.  WORD OF WARNING: Butter flavor smells awful.  Your cake won't, but the flavor itself is not a pleasant odor.  Jussayin'.
Divide evenly between prepared pans...
...and bake 30 minutes at 350 degrees F.  Cool 5-10 minutes and invert onto wire racks to cool.  This is seriously the best cake I've ever made.  It came out totally level, which has pretty much never happened before.  Best cake EVAR.
Dough:
Make as directed, OR use my cookie dough truffles recipe.  I actually think it tasted better than the recipe I just gave you above.  Know why?  The dough balls had salt in them.  It's not really cookie dough without that salty taste, you know?  So it's not like I have anything against salt, it's just that salt in frosting is bad.  So let the dough chill for an hour...
Then form it into balls.
Frosting:
Cream butter...
...with light brown sugar...
Add powdered sugar and salt (IF YOU DARE)...
Add vanilla...
...and mix until smooth.
Assembly:
Stir those dough balls in with the frosting.
Spread the dough mixture thing on top of the first cake and smooth it down flat... (YUM!)
Seal coat your cake and let it chill for half an hour.  COVER YOUR FROSTING!  And do NOT refrigerate it!  Guess who did that and winded up with a bunch of hard, crusty frosting?
Frost the rest of your cake...
And decorate it.  Ohhhhh yes.
Don't bother trying to stick the medium cookies in the exact middle of the sides.  They're too heavy, so they just slide down anyway.
Have yourself a slice and bite into bliss.
Have a dough-licious day!
-JJ

Happy 4th in advance!

Sunday, June 10, 2012

Chocolate Peanut Butter Pretzel Bites

So, what with leftover pretzels from those pretzel cookies, I decided that I couldn't just eat them all.  Well, I could, but I shouldn't.  So I made a compromise between wanting desperately to eat pretzels and not wanting to eat pretzels: I have to eat them in a creative way.

Which results in lots of YUM.

Pretzels can be paired with almost anything good.  Like peanut butter, as I've previously mentioned.  And, well, duh, CHOCOLATE.

So, I'm sure I've seen some of these pretzel sandwich thing bites around the blogosphere, but I'm still calling this an original recipe.

Chocolate Peanut Butter Pretzel Bites
1 bag pretzels (not the stick kind)
1 jar chunky peanut butter
1 bag semisweet chocolate chips
  1. Spread chunky peanut butter on one pretzel.  Put another pretzel on top and press down slightly.  With a knife, scrape off the extra peanut butter that escapes through the holes in the pretzels.  Repeat this step until you've made as many pretzels as you want.
  2. Lay pretzel bites on a plate lined with wax paper.  Freeze, uncovered, for half an hour to an hour or until firm.  Do not remove pretzel bites.
  3. In a medium saucepan, melt chocolate chips.
  4. Take pretzel bites out one at a time and dip in chocolate using a spoon.  Lay on another plate lined with wax paper.  Continue until all pretzel bites are dipped.
  5. Refrigerate for an hour or until firm.
It's very simple, but I'll break it down anyway:
Take two pretzels.
Spread with chunky peanut butter.
I suppose you could do it with creamy peanut butter, but it's not as interesting that way, in my opinion.
Sandwich another pretzel on top...
...and freeze.  Then dip.  And... ta-da!
They are scrumptious.  They're really hard at first when you take them out of the fridge, but they start to soften really fast.  I mean, the chocolate starts to melt.  So eat these babies quick!

Enjoy!
-JJ
Related Posts Plugin for WordPress, Blogger...