
Talk about a housewarming gift!

Original recipes for the win! :3
And yes, I did bring these to my friend's new home. She moved away :( but I still keep in touch with her.
Anyhoo, if you knew me, you'd know that I jump at every chance to make cake pops. Every chance - whether it be Christmas, St. Patrick's Day, or for my own parties.
And here are the results of another chance: house cake pops.
Okay, yeah, they do look like birdhouses. They look a lot like birdhouses - because they're on sticks. I hadn't thought of that before I'd already dipped all of the pops. But, whatever. If you try making these, you could just make them house cake balls and stick them in green/floral/whatever mini cupcake wrappers.
I am quite proud of these, actually. I do declare my cake pop making and decorating skills are improving. I probably messed up only one of these. And then promptly ate it.
In case you're new to the cake pop making world, then I'll post the actual yellow cake and vanilla frosting recipes I use. They are my go-to recipes, and work wonderfully - figures, they're from Bakerella!
True, they're both included in my cupcakes post, but now, in future cake pop posts, I can just link back here! ^_^
Now, without further ado, I will present you with the original recipe - and then go into a fairly detailed breakdown:
House Cake Pops
REQUIRES SOFTENED BUTTER
REQUIRES ROOM TEMPERATURE EGGS AND MILK
REQUIRES COOLING TIME (1-2 hours/overnight)
REQUIRES CHILLING TIME (3-4 hours/overnight)
Makes 40 cake pops
Cake:
3 cups flour
2 teaspoons baking powder
1/2 teaspoon salt
2 sticks unsalted butter, softened
2 cups sugar
4 eggs, room temperature
2 teaspoons vanilla
1 cup milk, room temperature
- Preheat oven to 350 degrees F. and grease a 9x13 inch pan.
- In a large bowl, whisk together flour, baking powder, and salt.
- In a separate large bowl, cream softened butter and sugar. Add eggs, one at a time, stirring well after each addition. Add vanilla and combine.
- Alternatively add flour mixture and milk, in this order: 1/3 flour mixture, 1/2 milk, flour, milk, flour.
- Spread into prepared pan and bake 35-40 minutes or until a toothpick inserted in the center comes out clean. Let cool completely - this often takes overnight.
Frosting:
1 1/2 sticks butter, softened
1 teaspoon vanilla
3 cups powdered sugar
1-2 teaspoons milk, if needed
- In a large bowl, beat together softened butter and vanilla until combined.
- Mix in powdered sugar, one cup at a time, stirring well after each addition.
- Add milk if necessary to make the frosting more creamy.
Assembly:
10 full graham cracker sheets
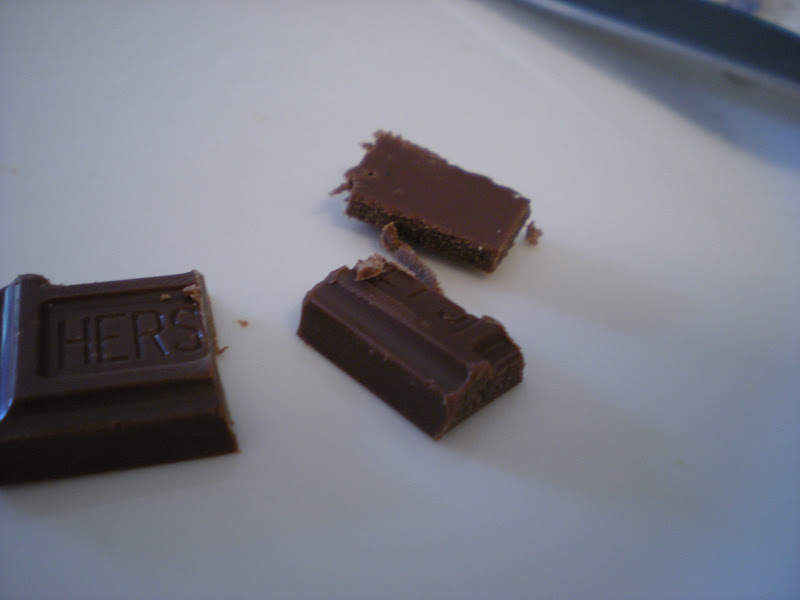
1 Hershey's milk chocolate bar
1-2 bags Target white chips
40 lollipop sticks
Oil
Styrofoam block with holes for pops
- If there are any brown edges to your cake, cut them off. Then crumble the remaining yellow cake into a large bowl. Add frosting and stir gently with a wooden spoon until the mixture is fairly even.
- Form into 40 cake cubes, method demonstrated here. Use remaining mixture to create 40 triangular prisms, pictured below. Place triangular prisms on cubes, pressing slightly. Place house cubes on a cookie sheet covered with wax paper and cover with plastic wrap. Refrigerate overnight or until firm.
- Break graham cracker sheets into four sections, and break each section in half.
- Take 10 sections of a Hershey bar and cut into four pieces.
- Place a metal bowl over a saucepan of water and heat; make sure the water doesn't touch the other side of the bowl. Drop in a few white chips - when they have melted you are ready to begin.
- Pour a small amount of oil in the bottom of the bowl and pour in some white chips. Let melt and stir smooth. TURN OFF THE HEAT.
- Dip lollipop sticks into melted white chips and then into the bottoms of the house cubes. Refrigerate while you dip the rest of the sticks.
- Dip pops completely in melted white chocolate, brushing off excess with a toothpick. Immediately stand in styrofoam block and add 2 graham cracker pieces to the roof and 1 Hershey's piece as a door. Make finished cake pops one at a time - white chocolate will set up quickly.
- Continue dipping and decorating. If more white chocolate is needed, turn on heat, add more oil, and add more chips. Turn off heat once it has melted and continue to dip.
- Let pops harden completely before taking them anywhere or serving them. They may be refrigerated, tightly covered, for up to 3 days, and frozen, tightly covered, for about 2 weeks.
Breaking it down:
So your house cubes will look like this. You need the little prism-thingies so that the graham cracker roofs can go on easily. They're pretty easy to form, but it did take me a few tries to get it right. Just try to make them look like this:


Have fun making these!
-JJ

No comments:
Post a Comment