Showing posts with label modified. Show all posts

Saturday, October 13, 2012

Brownies - and White Chocolate!

A perfect combination of two of my top favorite things: white chocolate and brownies.  Wut.  And they are very delicious.

STORYTIME!!!

I made these for a very special occasion - watching Doctor Who with my friends! :D If you are not a so-called Whovian yet, then you really oughta be.

Because this guy right here...
...is Matt Smith and he's adorable.  Bow ties are very cool.

So, Season 7 of the new series (because DW goes back a looong time, back to 1963) just premiered, well, a while ago, but I'm behind because unfortunately I don't have BBC America at my disposal.

That's right, this is a British sci-fi show.  And it's awesome.

So, these brownies hold memories for me.  Memories of dinosaurs on spaceships and hilarious little quips and the Doctor's (ex-)companions, Amy and Rory.  Ahhh, the good old days.

Now, the good nummy brownies!  Owe this recipe - mostly - to Nestle at Very Best Baking!  I did make a few changes though... ;)

White Chip Brownies
1 cup flour
1/2 cup cocoa
3/4 teaspoon baking powder
1/4 teaspoon salt
1 1/4 cups sugar
3/4 cup butter, melted
2 teaspoons vanilla
3 large eggs
2 cups/12-oz. package white chocolate chips, divided

  1. Preheat oven to 350 degrees F.  Grease a 9-inch square baking pan.
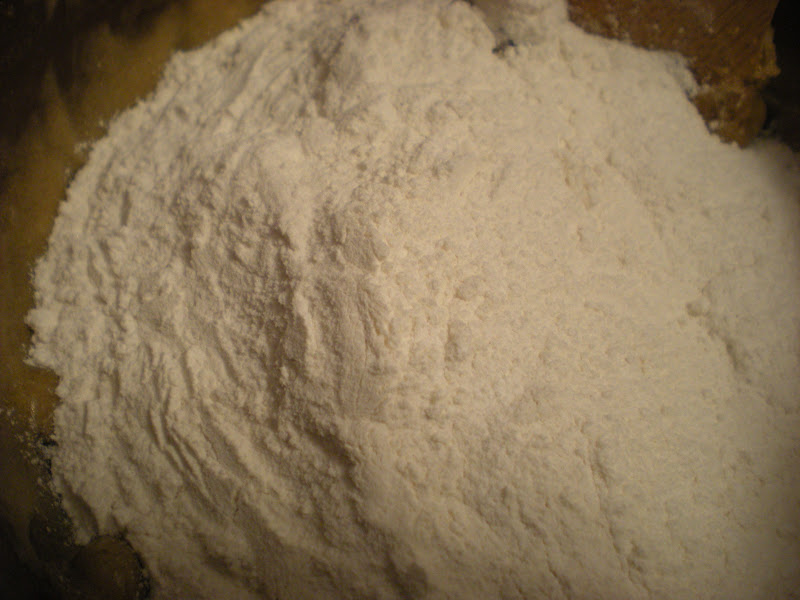
  2. In a medium bowl, combine flour, cocoa, baking powder, and salt with a fork.
  3. In a large bowl, beat sugar, butter, and vanilla.  Add eggs, one at a time, beating well after each addition.  Gradually add the dry ingredients.
  4. Stir in 1 cup white chocolate chips and spread into prepared pan.
  5. Bake 25-30 minutes or until toothpick inserted in the center comes out slightly sticky.  Cool on a wire rack.
  6. In a metal bowl over a saucepan of simmering water, melted remaining cup of white chocolate chips, stirring constantly with a rubber spatula.  Once completely melted, spread on cooled brownies, covering the entire surface.
  7. Refrigerate 5 minutes and cut into squares.  Store room temperature, covered with plastic wrap.  Makes 9-16 brownies.
So, yes, I changed the white chocolate part at the end - but you know what?  My version is easier and better.  So there.

Breaking it down:
Combine dry ingredients...
Then combine sugar, melted butter, and vanilla...
Add eggs...
Stir in the dry ingredients...
To make a beautiful brownie batter!
Stir in those white chocolate chips...
Then bake and coat with white chocolate!  They are absolutely delicious - all fudgy and white chocolatey and just beautiful inside your mouth.
My mouth is watering!
-JJ

Saturday, September 29, 2012

A First Attempt at Double Chocolate Chip Brownies

Well, the batter looks good...

These did not turn out well for one reason only - the chocolate I used.

Instead of using melted chocolate chips, I found some semisweet and unsweetened chocolate frozen in the freezer... that was probably a million years old.

It made all the brownies taste like vinegar.  I am not joking.  VINEGAR.

I'm sure if I had had the ingredients, these would have been awesome.  Which is why I'm not giving up yet!  (Hence the post name: First Attempt!)

Yes, these are only my first attempt.  I will be making another, probably in a month or so.  Halloween brownies, anyone? ;)

Here's the recipe, but I'll break it down for you anyway:
Melt chocolate and butter - and don't use unsweetened or old semisweet!
 Stir in eggs...
 Stir in flour...
 And sugar and baking soda and vanilla...
 Then stir in your chocolate chips.
Bake about 22 minutes at 350 degrees in a greased 9x13 inch baking pan.
They look good, and the texture is absolutely PERFECT, but just remember to use the right kind of chocolate if you're going to try to make these!
-JJ

Wednesday, August 22, 2012

Chocolate Chunk Brookies


Ever since I heard the term "brookie," I was hooked.  Cookies and brownies combined must mean awesome, right?

Well...

While I'm not saying these aren't good, I'm just saying I don't like these that much.  I mean, I'm so not a blondie fan it's unbelievable.  Unless it has white chocolate in it.  Then yes.

And these brookies tasted like blondies with chocolate chunks.  (Yes, yes, I know, it's supposed to be chocolate chips but I made do with what I had on hand at the time.  Chunks work just fine.)

I got this recipe from Bakerella, and I'm sure these would have been better if I had her oven.  Like, seriously, hers turned out amazing-looking and absolutely delicious, I'm sure.  But mine... they sort of collapsed and didn't really cook in the middle.  Which is fine and all if it tasted like cookie dough - but it DIDN'T.

Now that I think about it, the edges were really tasty.  But the middle...  And this is coming from the girl who loves cake batter, cookie dough, pretty much anything raw.  This should not be raw.  Nooo.
So, if your oven is like mine, please see the asterisk* for baking instructions.  If your oven runs hot like Bakerella's, use the normal baking instructions.  I really don't know what the difference between our ovens are except that mine is a few years old and not specifically for baking.  I'm not even going to try to guess what other bakers have.  It'll just make me feel inadequate. XP

Anyhoo, here's the recipe if you want to try it.  Not saying you shouldn't, but I'm not saying you should, either.  I'll find scrumptious things to bake yet, don't you worry!

Chocolate Chunk Brookies
REQUIRES SOFTENED BUTTER

2 3/4 cups all purpose flour
2 1/2 teaspoons baking powder
1/2 teaspoon salt
2/3 cup butter, softened
2 1/4 cups light brown sugar
3 large eggs
1 teaspoon vanilla
2 cups chocolate chunks
  1. Preheat oven to: 350 degrees F.  Grease a 9x13 inch pan.
  2. Combine flour, baking powder, and salt in a large bowl with a fork.
  3. In a separate bowl, cream brown sugar and butter.
  4. Add eggs one at a time, stirring well after each addition.  Stir in vanilla.
  5. Stir in chocolate chunks.
  6. Add flour mixture and stir until thoroughly combined.
  7. Bake 30 minutes.  If not done in the middle, cover with aluminum foil and bake additional time.  Test with a toothpick every 5 minutes.  Bake until golden brown and do not over bake.
And now I'll break this down for ya - but note that I only made a half-batch!  Maybe that's my problem...

Combine butter and brown sugar...
Add eggs...
Stir well and add vanilla.
Stir in those chocolate chunks...
Add the flour mixture...
And spread into your pan.
Now this is what mine looked like at first...
But unfortunately the center collapsed and I was left with this.  While it does look appetizing, it was only slightly baked.  I.e. almost raw.  And almost raw is wayyyy more nasty than raw.  It is awful.
But the sides came out quite nicely.
If a little crunchy.  You can see the raw-ness inside here.
I wish you luck on this baking endeavor should you choose to try it!
Otherwise, thank you and have a jolly good day!
-JJ

Saturday, August 18, 2012

Extra-Chocolatey Chocolate Euphoria Cookie Bars


Yes.


A thousand times yes.

Once I saw this in Joanne Fluke's Devil's Food Cake Murder, I was in love.

Completely in love with this recipe.  Even the name screams CHOCOHOLIC!
Okay, in the original recipe, the frosting is just a suggestion at the end of the actual recipe.  But HEAR ME OUT before you decide that it's too much chocolate!

One, the fudge frosting makes these look more like brownies and less like little cookie bars of death by chocolate chips.
Two, chocolate chips exposed to hot air (but not long enough to melt) taste sort of sketch.

Three, the frosting holds the whole cookie bar together and makes it look thicker.

Four, if you're only making a half-pan of this (8x8), then you'll have half a can of sweetened condensed milk leftover.  And if you're like me, the temptation of plain sweetened condensed milk sitting in your refrigerator cannot be resisted, no matter how much you try.  But if you make the frosting too, then you won't have any sweetened condensed milk leftover.  This is a good thing.

Five, it's more chocolate.  And that is never wrong.

So now you have my reasons.

I have made this twice so far.  And both times it received standing ovations.  Well, not really, but I got a lot of compliments, okay?

The first time I made the whole batch, with frosting.  The second time I made a half-batch, again with frosting.  I think the frosting adds a lot, though.  It makes it seem like the whole bar is going to be smooth and then you hit the cereal and the Oreo crust and it's like CRUNCH.

What's that?  Oreo crust?  Cereal?  What's in these things?  Let me break it down for you.  In order.

Oreo crust.  Semisweet chocolate chips.  Mini marshmallows.  Sweetened condensed milk.  White chocolate chips.  Chocolate cereal.  Milk chocolate chips.  Optional but highly recommended fudge frosting.

Ohhhhh yes.

About the cereal.  (Yes, I know, shut up already we want the recipe, but you might just want to pay attention to this.)

The original recipe calls for Cocoa Puffs or Cocoa Krispies.  Now, I have grown up on Cheerios and Oatmeal Squares, and I have never had these - and for good reason.  There is NOTHING healthy in them.  Like absolutely zilch.  And while these cookie bars are the opposite of healthy, I feel a lot better if I try to stick something half-healthy in there.

Chocolate Chex, baby.  It exists, and it's good.  And it's sort of healthy.  And it has plain Rice Chex in there too - which gives the cookie bars some more contrasting color.

Also, it crunches really truly delightfully when you take a bite.  It's an experience that you don't want to miss out on.  I'm serious.  That crunching noise it makes seriously has made my day.  Really.

Oh, right, also - WARNING: You will become addicted to these bars.  You will want to make lots and lots of them.  You will become a chocoholic like meeee. *evil chuckle*

Chocolate Euphoria Cookie Bars - with Chocolate Frosting
2/3 package Oreos (approximately)
1 stick butter
3 cups semisweet chocolate chips, divided
2 cups miniature marshmallows
2 14 oz. cans sweetened condensed milk
1 cup white chocolate chips
2 cups Chocolate Chex
1 cup milk chocolate chips
  1. Preheat oven to 350 degrees F.  Grease 9x13 inch pan.
  2. Crush Oreos and measure out 1 1/2 cups.
  3. Melt stick of butter in large microwave-safe bowl.  Add crushed Oreos and combine thoroughly.
  4. Spread Oreo mixture into prepared pan.  Sprinkle extra crushed Oreo over gaps if necessary.
  5. Evenly sprinkle 1 cup semisweet chocolate chips over Oreo crust.
  6. Evenly sprinkle miniature marshmallows over the semisweet chocolate chips.
  7. Pour 1 can sweetened condensed milk over marshmallows as evenly as possible.
  8. Sprinkle white chocolate chips over that as evenly as possible.
  9. Sprinkle Chex over white chips as evenly as possible.
  10. Sprinkle milk chocolate chips over Chex as evenly as possible.
  11. Press down on layers with the back of a metal spatula.
  12. Bake 20-25 minutes.  Remove from oven and let cool on a wire rack.
  13. While the bars cool, melt remaining 2 cups semisweet chocolate chips in a medium saucepan over low heat, stirring constantly.
  14. Once melted, add remaining can of sweetened condensed milk to the chips and stir vigorously for about 2 minutes.
  15. Remove from heat and immediately spread on fully-cooled bars.
  16. Once the frosting on top has cooled, cut into bars and refrigerate covered.  Makes 24 bars.

Breaking it down:
Melt the butter...
Combine with those crushed Oreos...
And spread out a beautiful Oreo crust for yourself.
Sprinkle with those semisweet chocolate chips...
Then the marshmallows...
And then pour on that sweetened condensed milk that I've ranted about so many many times.
Sprinkle on those white chocolate chips...
And the Chocolate Chex (because if you're using another cereal you SHOULDN'T BE)...
And at last, the milk chocolate chips.
Press it down and bake it for 20 minutes at 350 degrees.  So delightful.
Whip up your frosting while all this loveliness cools...
And frost those puppies!  Delish!
And of course, while you enjoy probably 5 million milligrams of caffeine and pure chocoholic high heaven, eat it with a fork. xD
You will be in love.  I guarantee it.
-JJ

Wednesday, July 25, 2012

S'Mores Bars

First, an announcement: I'm going to New Mexico for a week and a half!!  Woot!!  And I'll be sure to bring back plenty of pictures this time.  I promise - this time I actually will charge my camera!

So, I won't be posting for a little bit.  Sadface. :(

But I do have one last recipe for you before I leave: S'mores Bars!

Now, there is a story behind these bars.

For countless summers, our neighborhood has hosted a block party sometime between the 4th of July and Labor Day.  There would be games and pet parades and a potluck and glowsticks and all that good stuff.

And each year, the family who hosted it would bring these bars.

I couldn't eat enough of them.  They were heavenly.  They were one of my favorite parts of the entire summer.  And that's saying a lot.

And I had no idea how to make them.

Until I started reading the Hannah Swensen mysteries.

It was the same recipe, except called Rocky Road Bar Cookies and it had added cashews.  So I modified it to be the same as the block party bars.  You can find the original recipe in Carrot Cake Murder.

You have got to make these.  They are pretty easy and really delicious.  They may look a little weird if you've never had them before, but veteran chocoholics like me know scrumptious when we see it.  And these are scrumptious.  Trust me.

S'Mores Bars
12 graham cracker sheets (approximately)
2 cups mini marshmallows
1 cup (6 oz.) semisweet chocolate chips
1 stick butter
1/2 cup brown sugar, packed
1 teaspoon vanilla
  1. Preheat oven to 350 degrees F.  Grease or Pam a 9x13 baking pan.
  2. Lay out graham crackers in pan.  You will have to break some in half or in quarters, and they may overlap.
  3. Sprinkle marshmallows evenly over graham crackers.
  4. Sprinkle chocolate chips evenly over marshmallows.
  5. In a small saucepan, melt butter over low heat, stirring constantly.  Stir in brown sugar, stirring constantly until the sugar is dissolved.  Remove from heat and stir in vanilla.
  6. Drizzle evenly over pan.
  7. Bake 10-12 minutes or until marshmallows are golden.  Cool in pan on a wire rack.
  8. Once cool, cut into bars and serve.  Store covered chilled or at room temperature.  Makes 24-36 bars.

Breaking it down:
Lay out your graham crackers like so...
Sprinkle evenly with marshmallows...
Sprinkle on those chocolate chips. :D
Melt your butter...
with brown sugar...
Remove from heat and add vanilla...
Pour over your pan...
And bake about 10 minutes.
Remove from oven, let cool, and serve.  They are delicious.
And now, my fork rant.  At the block parties, I had no choice but to eat these with my fingers - which is fun and all, but it gets your fingers very sticky.  Thus, the fork.

I love forks.

I will seriously eat anything that I bake with a fork.  Brownies, bars, cake, pie, muffins, cupcakes.  Forks rule the world!

Cookies and donuts are like my only exceptions.  So that's why there's a picture of a fork in nearly every post.  Maybe I should design my own fork.  The Lemonade Fork.  Yeah, that could work.

Enjoy these!
-JJ
Related Posts Plugin for WordPress, Blogger...