Saturday, April 28, 2012

Look Up Update #3: Maho Edition

More Look Up pictures for ya!  Be sure to check out the rest on the project page!
-JJ

Wednesday, April 25, 2012

1st Blogiversary!

Wow... It's hard to believe that a year has gone by since I started this blog.  I admit, I haven't done much with it, but now that I'm posting on a somewhat regular schedule, I hope to go further and experiment more in the kitchen.

However, right now I'll post one of my all-time favorite baking recipes: Chocolate Chunk Scones.


Chocolate Chunk Scones
2 cups flour
1/3 cup packed brown sugar
1 1/2 teaspoons baking powder
1/2 teaspoon baking soda
1/4 teaspoon salt
6 tablespoons unsalted butter, chilled
1/2 cup buttermilk
1 large egg
1 1/2 teaspoons vanilla
1 cup chocolate chunks

  1. Preheat oven to 400 degrees F.  Butter a 9-inch-diameter circle on a wax paper lined baking sheet.
  2. In large bowl, combine flour, brown sugar, baking powder, baking soda, and salt.
  3. Cut butter into 1/2-inch cubes and distribute evenly over flour mixture.  Cut in butter with a pastry blender or two knives until the mixture resembles coarse meal.
  4. In small bowl, combine buttermilk, egg, and vanilla.
  5. Add buttermilk mixture to flour mixture and stir to combine.
  6. Stir in chocolate chunks.  The dough should be sticky.
  7. Spread dough into 8-inch-diameter circle in center of prepared baking sheet.  With a serrated knife, cut into 9 wedges.
  8. Bake 17-19 minutes or until top is lightly browned and a toothpick inserted into center of a scone comes out clean.
  9. Remove baking sheet to wire rack and cool for 5 minutes.  Using a spatula, transfer scones from sheet to rack to cool.  Recut if necessary.  Serve warm or store in an airtight container after cooled.  Makes 8 scones.
Breaking it down:
Combine flour, brown sugar, baking power, baking soda, and salt...
 Cut butter and add...
 Cut in with a pastry blender until it looks like this:
 Combine buttermilk, egg, and vanilla...
 Pour into flour mixture...
...and stir.
 Add chocolate chunks...
 ....and plop onto your prepared baking sheet.
 Spread it out in a (mostly) circular shape...
 ...and cut into 8 pieces with a serrated knife.
Bake for 17-19 minutes at 400 degrees F and remove from oven.
Let cool 5 minutes on a wire rack, then let the individual scones cool the wire rack.  Serve and love every bite of it.
I know I did!
Happy Blogiversary again,
-JJ

Saturday, April 21, 2012

Maho Overview

I went to Maho Bay Camps for a week this spring.  I came back with good experiences and about fifty bug bites (not joking - I counted).  And a goal: to recreate one of the desserts I had there.  But more about that later. ;)

Maho Bay Camps is basically a campground on a bunch of boardwalks and stairs.  Lots of stairs.
It's around 200 steps from the beach to our tent, D7.  The tents are simple -
- and rather small.  That picture is about half of it.  Oh, they're also smack dab in the middle of a jungle.
But a very pretty jungle with lots of pretty plants! :3
Animals are abundant there.  The best animal to see is a lizard in your tent...
...which means no mosquitoes! :D Then there are the cats that roam the stairs and the dining area, hoping to catch a nap under your bed or score some bacon at breakfast.
This is the stunning (although cloudy) view from our tent...
The art gallery, where the Maho artists' recycled glass blowing creations are displayed and for sale...
The pavilion, where breakfast and dinner are served...
And other various vacation pictures:
 (that's St. John, btdubbs)

Anyhow, I had a great time and there will soon be Look Up pictures!
-JJ

P.S. Maho Bay Camps may be nearing its end.  Visit this amazing place and let's hope that its many devoted visitors can keep it in business!

Wednesday, April 18, 2012

Angel Kisses

50th post! :)

Remember those 8 egg whites I had leftover from the lemon curd in the Lemon Cake?  Well, I found a good use for 6 of them (the rest work just fine in scrambled eggs): a double batch of Angel Kisses.

Angel Kisses are, you guessed it from the picture and the amount of egg whites, meringue cookies.  Very easy to make with an electric mixer, and very good - oh yeah, and they have chocolate in them.

This is yet another Joanne Fluke recipe, from her Cherry Cheesecake Murder.

Angel Kisses
3 egg whites
1/4 teaspoon cream of tartar
1/2 teaspoon vanilla
1/4 teaspoon salt
1 cup sugar
2 tablespoons flour
about 30 Hershey's Kisses, unwrapped

  1. Preheat oven to 275 degrees F.  Let egg whites come to room temperature.  Line baking sheets with parchment paper.
  2. Beat egg whites with cream of tartar, vanilla, and salt until they hold a soft peak.  Gradually add in the sugar, beating hard after each addition.  Sprinkle in the flour and mix at low speed.
  3. Drop little mounds of dough on cookie sheet, 16 mounds per sheet.
  4. Place one Hershey's Kiss, pointed up, on each mound.  Press down slightly on the Kiss, but don't push it to the bottom of the dough mound.  Drop another meringue mound on top and make sure that it covers the Kiss.  (Spread/poke at it with a spoon until you can't see the Kiss anymore.)
  5. Bake at 275 degrees F. for about 40 minutes, or until the tops of the cookies are slightly golden and dry to the touch.
  6. Cool on a wire rack.  When completely cool, peel off cookies from paper and store in an airtight container in a DRY place or serve.  Yield: 3 to 4 dozen.
You don't have to use Hershey's Kisses in this recipe - any small chocolate candy without a coating will do - but the name is "Angel Kisses" for a reason...and plus the Kiss gives the cookies an adorable shape.

Breaking it down:
Beat egg whites, cream of tartar, vanilla, and salt...
...until soft peaks form.
Gradually add in sugar...
Then add flour...
...and mix well.
Drop by mounds onto cookie sheet.
Take your Kisses...
Unwrap them...
...and place one in the middle of each mound.  (Aren't they so cute?)
Press down slightly on each Kiss...
...and drop another meringue mound on top to cover it up.  Make sure it covers it completely or you'll have cracks in your cookies!
Bake at 275 degrees F. for 40 minutes and cool on a wire rack.  Peel off and enjoy!
These are by far the cutest cookies (without decoration, of course) that I've made - and they taste pretty good, too.  Enjoy!
-JJ

Saturday, April 14, 2012

Lemon Cake

I made this delicious cake from Martha Stewart for Easter, and now I've finally gotten around to posting it!  It was a big hit among friends and family, and despite its complications, it was totally worth it.

It also looks very pretty.

Lemon Cake
REQUIRES SOFTENED BUTTER
REQUIRES CHILLING TIME
DON'T THROW EGG WHITES AWAY (use in frosting/other recipes)
(It also takes 3 lemons.)

Lemon Cake:
2 1/2 cups all-purpose flour (spooned and leveled)
1/2 teaspoon baking powder
1/2 teaspoon baking soda
1 teaspoon salt
1 tablespoon lemon zest
2 sticks unsalted butter, SOFTENED
2 cups sugar, divided
2 large eggs
3 large egg yolks
1/4 cup plus 2 tablespoons lemon juice
1 cup buttermilk
1/2 cup water
1 lemon, thinly sliced and seeded

Lemon Curd Filling:
1 cup sugar
1 tablespoon lemon zest
2/3 cup lemon juice
8 large egg yolks
1/4 teaspoon coarse salt
1 1/4 sticks unsalted butter, cut into pieces

Whipped Frosting:
3 large egg whites
3/4 cup sugar
Pinch of salt
1/3 cup water
2 tablespoons lemon juice (if you like really lemony frosting - I used 1 1/2 and it worked just fine)


For the Lemon Cake:
  1. Preheat oven to 350 degrees F.  Butter and flour (Pam probably works fine) two 8-inch round cake pans.
  2. In a medium bowl, whisk flour, baking powder, baking soda, salt, and lemon zest.
  3. In a large bowl, beat butter and 1 1/2 cups sugar until light and fluffy.  Beat in eggs and yolks, one at a time.  Add 2 tablespoons lemon juice and combine.
  4. Alternately beat in flour mixture and buttermilk, starting and ending with flour.
  5. Divide batter between pans and smooth tops.  Bake 32 to 35 minutes, or until sides pull away from pan.
  6. While cakes are baking, boil remaining 1/2 cup sugar and water in a saucepan.  Add lemon slices and simmer for 25 minutes.  
  7. Using a slotted spoon, transfer candied lemon slices to a wax-paper-covered plate.  Stir in 1/4 cup lemon juice to sugar water to make lemon syrup.
  8. Remove cakes from oven and let cool for 10 minutes in pans.  Run a plastic knife around sides of pans and turn out onto wire racks.
  9. Using toothpick, poke holes in tops of warm cakes.  Brush with lemon syrup.  Let cool completely before frosting.
For the Lemon Curd:
  1. In a saucepan off heat, whisk sugar, zest, and egg yolks.  Whisk in lemon juice and salt.
  2. Add butter and cook, whisking constantly, over medium high, until butter has melted, the mixture is thick enough to coat the back of a spoon, and small bubbles form around the edges of the saucepan, about 5 minutes.  Don't boil.
  3. Continue to whisk and remove from heat.  Pour curd through fine-mesh sieve into a glass bowl.  Press plastic wrap against surface of curd and refrigerate until totally cool.
For the Whipped Frosting:
  1. In a metal bowl set over a saucepan of simmering water, combine egg whites, sugar, salt, and water.  Cook over medium, stirring constantly, for 2-3 minutes or until sugar has dissolved.  Transfer to large bowl.
  2. Using electric mixer, beat on medium-high until stiff, glossy peaks form.  Do not overbeat.  Reduce speed to low and add lemon juice, then beat until just combined.  Use immediately.
Assembly:
  1. Spread lemon curd over the flat side of one of your cakes.  You'll have leftover curd.
  2. Place the other layer, flat side down, on top.
  3. Spread fresh whipped frosting over cake with a spatula or frosting knife.  It will easily spread over sides and top.
  4. Garnish with candied lemon slices on top of cake.
  5. Serve immediately or before you need to refrigerate it.  FROSTING DOES NOT KEEP IN FRIDGE.
Some tips before we dive in:
  • The lemon syrup was... very lemony.  In my opinion, you can probably skip the syrup because the cake is already so dense and moist.  Just add some more lemon juice to the actual cake and you'll get away with a not-too-sour cake.
  • You can try to eat the candied lemon slices.  I don't recommend it.
  • If you plan on refrigerating the cake to keep until later, don't use the whipped frosting.  Find a nice vanilla that you can make lemon, or just wait to frost it until before serving.  It's a meringuey frosting, and will dissipate/melt in the fridge.  It won't look very good anymore. :/ Personal experience at ya.
Anyway, now with my tips/warnings in place, we can break it down:
Whisk flour, baking powder, baking soda, salt, and lemon zest...
In a separate bowl, beat SOFTENED butter...
...and sugar...
...until fluffy.
Beat in eggs and yolks, one at a time.
RESERVE THE WHITES FOR THE FROSTING.
Mix in lemon juice.
Add some flour mixture...
Then some buttermilk...
...and repeat until both are gone.
Pour into pans and smooth the tops.
Bake for 32 minutes.  Meanwhile, slice a lemon...
...and boil sugar and water.  Add lemon slices and simmer for 25 minutes.
Remove from saucepan with a slotted spoon...
...and place on a wax-lined plate.
Add lemon juice to your to-be syrup mixture.
Your cakes should be done by now, so remove them from the oven and let cool 10 minutes in pans...
Then run a plastic knife around the edges of the pans (so that you don't scrape them up too badly) and invert them onto wire racks.
Poke holes into the tops all over with a toothpick...
...and brush with lemon syrup (you will use all of it - the cake soaks it up really fast!).
Now, start on your lemon curd by whisking sugar, zest, and egg yolks...
Whisk in lemon juice and salt...
Add butter...
...and cook until it's thick enough to coat the back of a spoon.  It'll thicken even more in the fridge.  Transfer to a glass bowl...
...cover with plastic wrap like so...
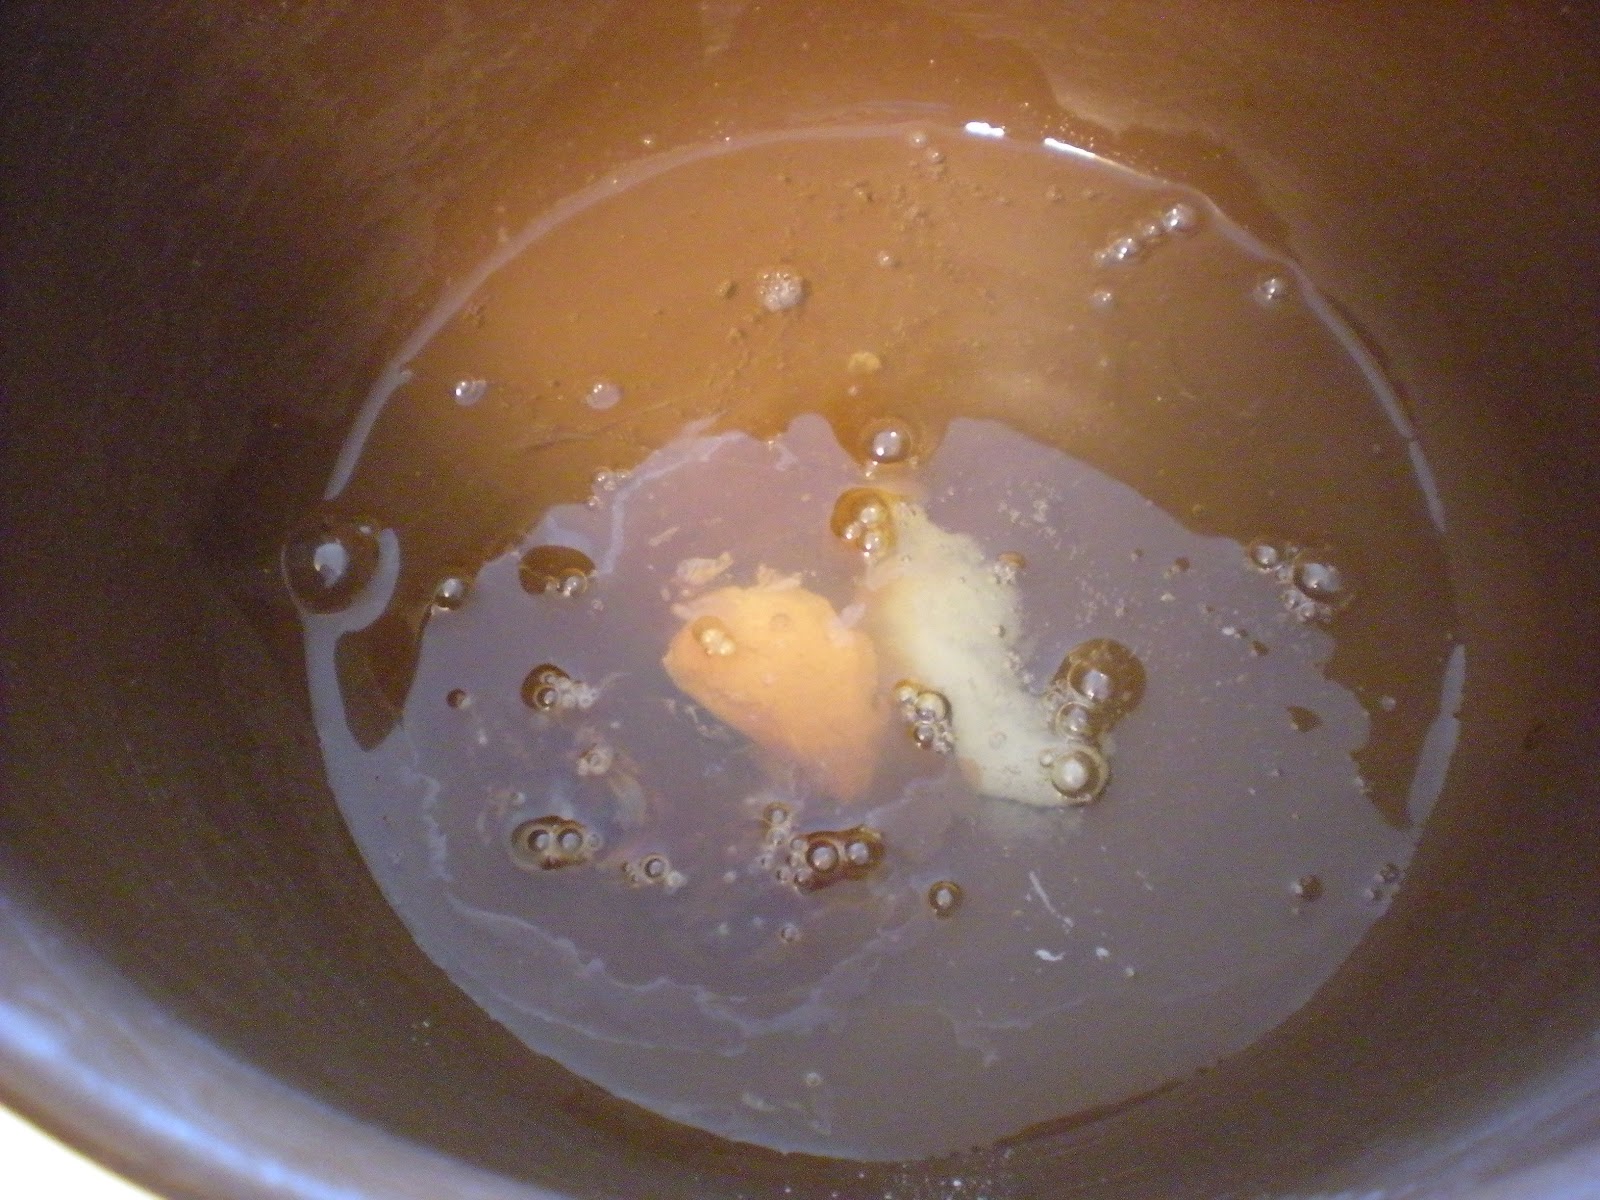
...and refrigerate until thoroughly cool.  Once the curd is coolish, start making your whipped frosting.  Combine egg whites, salt, sugar, and water in a homemade double boiler...
...until the sugar has dissolved; transfer to a large bowl.
Beat until stiff peaks form and mix in lemon juice until just combined.
Insert strips of wax paper underneath your first layer on its serving platter to catch drips.  Spread your cooled lemon curd over the flat side of one cake...
You'll have a lot of leftover curd, I guarantee it.  Serve it in little cups with blueberries or shortbread cookies, plop it in some mini tarts, or do what I did: eat it with a spoon! :3  Anyways, place the other cake, flat side down, on top...
Spread whipped frosting on top and around the sides of your cake...
Remove wax strips and garnish with candied lemon slices.
Enjoy!
-JJ
Related Posts Plugin for WordPress, Blogger...