
Wednesday, February 29, 2012
Knitting!
I don't just take pictures and bake, you know! ;) I love knitting - I'm just not very good at it. But I recently finished a project and I'm proud of it - just a simple knit-and-purl scarf made out of Bernat Boa Yarn.
 I used two rolls of boa yarn and knitted 25 rows. It turned out nicely and is warm and fashionable!
Saturday, February 25, 2012
Hershey's Kisses + Marshmallows = Chocolate Mousse

My impression of the mousse is this: it's relatively easy to make, but probably not worth it. Still, I'm posting it anyway, so give it a go and you might like it more than I did!
Hershey's Kiss Chocolate Mousse
36 Hershey's Chocolate Kisses
1 1/2 cups mini marshmallows
1/3 cup milk
1/4 teaspoon almond extract
1 cup (1/2 pint) whipping cream
Additional Kisses to garnish
- Combine marshmallows with milk in a saucepan over low heat. Stir constantly until marshmallows are melted and mixture is smooth, then remove from heat.
- Pour 1/3 cup marshmallow mixture into medium bowl and stir in almond extract. Set aside.
- Unwrap Kisses. Add Kisses to remaining marshmallow mixture and return to low heat. Stir constantly until the mixture is smooth. Remove from heat and cool to room temperature.
- Beat whipping cream in another small bowl until stiff. Fold 1 cup whipping cream into chocolate mixture. Fold remaining whipping cream into reserved marshmallow mixture.
- Pour chocolate mixture into 4 glasses/bowls. Spoon marshmallow mixture on top. Garnish with extra Kisses if desired. Refrigerate 3-4 hours. Makes 4 servings.
Remember, I halved this recipe, so your mousse will look different. Let's break it down:
Combine marshmallows with milk on the stove...

Stir until smooth.

Combine 1/3 of the marshmallow mixture with almond extract.

Unwrap Kisses...

Add to marshmallow mixture...

And combine over heat until smooth.

Remove from heat. As that cools, beat whipping cream until stiff...

Fold one cup into the chocolate mixture. Then fold the rest into the marshmallow mixture.

Pour chocolate mixture into desired containers, top with marshmallow mixture, and plunk an extra Kiss on top to look pretty! :)

Have a lovely day!
-JJ
Wednesday, February 22, 2012
Going Vegetarian
NOT PERMANENTLY!
Those are the two most important words of this whole post. I could never, ever live without my meat. XD I'm giving up meat to see if I can, maybe save a few animals in the process, and to explore vegetarian cooking. I hope to last at least a month, because shunning seafood is gonna be really tough and may just push me off the wagon.
So, this means I'll be posting vegetarian-friendly recipes for a (hopefully not too short) while! If you're interested in great vegetarian food, I'll make at least one recipe from The Cheese Factory Restaurant, an amazing restaurant in the Wisconsin Dells that I try to visit at least once a year. :) You may recognize the name for their famous grilled cheese, but they have much more to offer than a simple sandwich.
Here's to my resolution! Let's hope it lasts... at least until I've made something good! XD
-JJ
Saturday, February 18, 2012
Oreo Pie
OREOS = NOMS

For my mom's birthday, she wanted me to make her an Oreo pie. Since I'd been dying to make one since December, it's more of a gift for me than from me! ;)
Ever since I saw this recipe on therepressedpastrychef.com, I wanted to make this. Badly. So now I have, and hopefully it will satisfy my Oreo craving, too! XD You can find the original recipe here, but of course I've made some tweaks and notes.
Oreo Pie
1 Oreo pie crust
17 Oreo cookies
8oz cream cheese, softened
1/3 cup sugar
2 cups Cool Whip*, plus more for garnish
Breaking it down:
Crush 12 Oreos...
 (I did it with a spoon in a bowl like the original recipe said, but it'll probably go much less messier in a plastic bag.) The pieces should be about this big:
 Then combine your SOFTENED cream cheese with sugar...
 and seriously, use an electric mixer/beater to do this. For someone who detests taking the "lazy route," this saves a LOT of time.
 So now that it's light and fluffy, add the Cool Whip...
 and the crushed Oreos...
 and stir.
 When thoroughly (and gently!) stirred, it will look like this:
 Now unwrap your pie crust (unless you've made one of your own and then I am in awe of you and your awesome) ...
 Add spoon the filling into it.
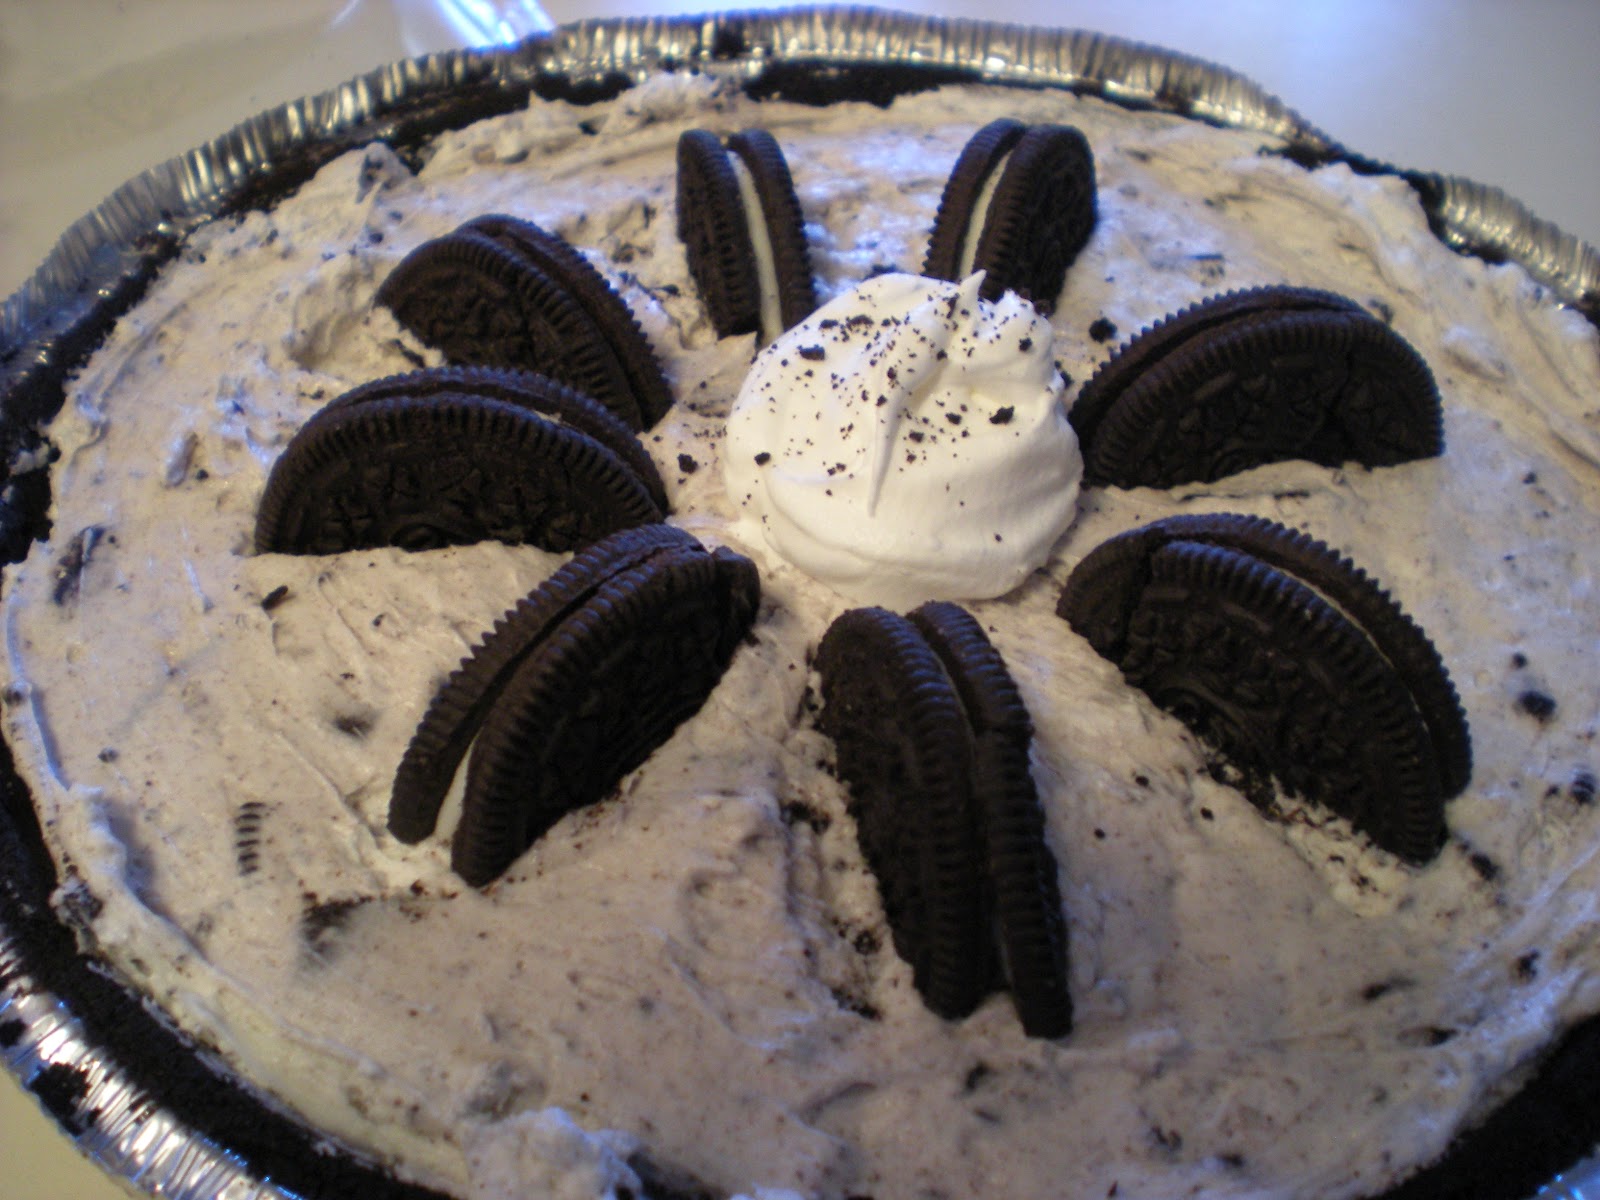
 Smooth it out with a spatula and garnish as directed or desired. :)

 I really liked this pie - and so did my mom! :) Despite only having five ingredients (and one of them Cool Whip) it tasted amazing!
 Have an scrumptious day!
-JJ

For my mom's birthday, she wanted me to make her an Oreo pie. Since I'd been dying to make one since December, it's more of a gift for me than from me! ;)
Ever since I saw this recipe on therepressedpastrychef.com, I wanted to make this. Badly. So now I have, and hopefully it will satisfy my Oreo craving, too! XD You can find the original recipe here, but of course I've made some tweaks and notes.
Oreo Pie
1 Oreo pie crust
17 Oreo cookies
8oz cream cheese, softened
1/3 cup sugar
2 cups Cool Whip*, plus more for garnish
- Place 12 Oreos in a plastic bag and crush into small-to-medium pieces.
- Combine cream cheese and sugar in a medium/large bowl until light and fluffy.
- Add Cool Whip and crushed Oreos. Stir gently with a rubber spatula or wooden spoon until the Cool Whip and Oreos are evenly distributed.
- Spoon into the Oreo pie crust and smooth with spatula.
- Scoop a dollop of Cool Whip into the center of the pie. Cut 4 Oreos in half and arrange them evenly around the dollop. Take the cookie part of remaining Oreo and sprinkle dollop with cookie crumbs. (Eat the rest of the Oreo :D)
Breaking it down:
Crush 12 Oreos...


-JJ
Tuesday, February 14, 2012
Happy Valentine's Day

Happy Valentine's Day! :)
I got that cute picture (technically it's a background, but hey, looks cool as is) from imagesforfree.org.
And here are some Basic Dessert Crêpes to go along with whatever plans you've made:
Basic Dessert Crêpes
1 1/2 cups milk
2 eggs
1 cup flour
2 tablespoons sugar
1 tablespoon vegetable oil
1/8 teaspoon (or a few dashes) salt
- Beat eggs and combine with milk in a small or medium mixing bowl.
- Add flour, stir. (Don't be worried if there are lumps!)
- Add sugar and oil. Stir, and add salt.
- Blend thoroughly with hand mixer, until all the lumps are gone.
- Heat a skillet on the stove and spray with nonstick cooking spray.
- Ladle in batter. Lift and tip skillet to spread batter evenly.
- Return to heat, and cook until edges turn brown. Release the edges with a spatula, and lift up the side of the
crêpe to see if it's brown on the underside. If so, flip it over and cook for less than half a minute on that side. - Remove
crêpe to a plate; repeat with remaining batter.
A quick note before I break it down as usual - don't do what I did in the photos and add the flour before the eggs. It turns out the same, but it looks wayy worse than if you do it the way I posted.
Pour milk...


Your crêpe appearance depends on your skillet, the heat, and your preference! Some like it really brown, some like it dotted with little holes, some like it spotty, and some like it undercooked. I'm easy any way, as long as they're delicious. :)

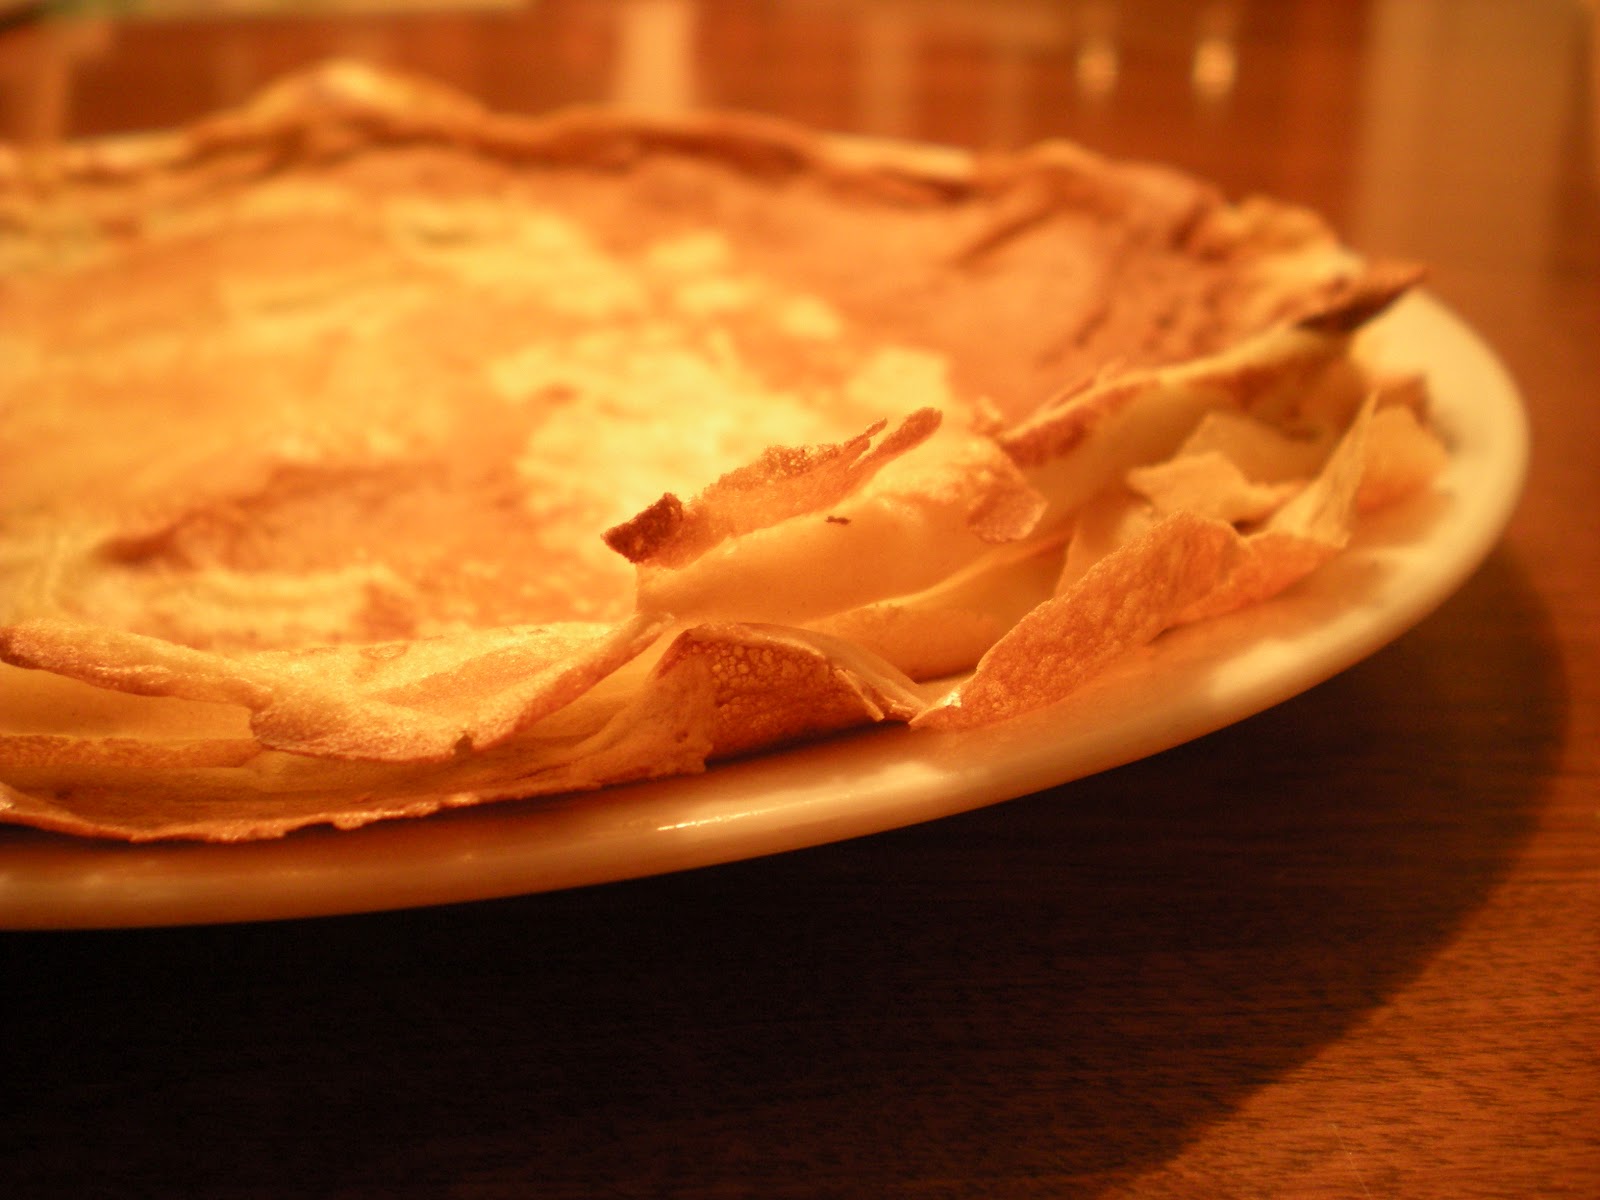
And then the yummy part - serving and eating!
These are called dessert crêpes for a reason - they're sweeter than savory crêpes. I eat them for breakfast on weekends usually. :)
And of course there are many ways to eat them. I take refrigerated leftover crêpes and dip them straight in sugar. I also spread warm ones with Nutella (sometimes with bananas) or just eat them plain with powdered sugar.
You can also spread lots of preserves, jams, or jellies on them - whichever flavor is your favorite!
Just spread...


...and enjoy!

-JJ
Saturday, February 11, 2012
Puerto Rico Pictures
These don't really apply to the Look Up category of Lemonade Soul, so I'm just posting them here. These are ancient (and modded) photos, like, from way back when in 2009, so you can totally tell that I haven't baked anything good this week. XD Still, I like the pictures, and they'd make purty (and free! ;D) backgrounds.
Enjoy!


Blah, blah, blah, copyright moi, mention the blog, all that jazz. XD
-JJ
Enjoy!


Blah, blah, blah, copyright moi, mention the blog, all that jazz. XD
-JJ
Subscribe to:
Posts (Atom)