Saturday, September 29, 2012

A First Attempt at Double Chocolate Chip Brownies

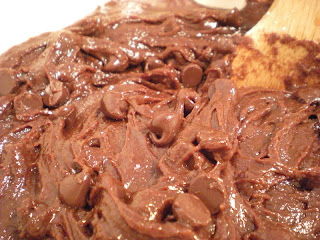
Well, the batter looks good...

These did not turn out well for one reason only - the chocolate I used.

Instead of using melted chocolate chips, I found some semisweet and unsweetened chocolate frozen in the freezer... that was probably a million years old.

It made all the brownies taste like vinegar.  I am not joking.  VINEGAR.

I'm sure if I had had the ingredients, these would have been awesome.  Which is why I'm not giving up yet!  (Hence the post name: First Attempt!)

Yes, these are only my first attempt.  I will be making another, probably in a month or so.  Halloween brownies, anyone? ;)

Here's the recipe, but I'll break it down for you anyway:
Melt chocolate and butter - and don't use unsweetened or old semisweet!
 Stir in eggs...
 Stir in flour...
 And sugar and baking soda and vanilla...
 Then stir in your chocolate chips.
Bake about 22 minutes at 350 degrees in a greased 9x13 inch baking pan.
They look good, and the texture is absolutely PERFECT, but just remember to use the right kind of chocolate if you're going to try to make these!
-JJ

Saturday, September 22, 2012

Cinnamon Roll Blondie Bars

Ohh, these are gorgeous.  Absolutely gorgeous.  Delicious.  They are cake with cinnamon sugar and wonderfulness.

And they are sooo easy to make.

Now, I associate memories with this.  The Bourne Legacy, for one.  This was what I ate the morning after I saw the midnight premiere.  Double-yum!

First off, before anything else, I've gotta break this recipe title down:
Cinnamon - always glorious
Roll - Cinnamon rolls.  YUM!
Blondie - Delicious.  As always.  Especially when connected with the Bourne Legacy.
Bars - Easy to eat.

So, glorious YUM delicious easy to eat.

Sounds do-able, doesn't it?

I got this recipe from the amazing Domestic Rebel, who makes awesome stuff with the simplest ingredients.

And now, without further ado, the recipe:

Cinnamon Roll Blondie Bars
1 box yellow cake mix
2 eggs
1/2 cup oil
1 teaspoon vanilla
1 cup brown sugar
1 teaspoon cinnamon
1 can cream cheese or vanilla frosting
  1. Preheat oven to 350 degrees F.  Grease 9x13 inch pan.
  2. In a small bowl, combine brown sugar and cinnamon.
  3. In a large bowl, combine cake mix, eggs, oil, and vanilla with a wooden spoon.  Stir well.  The dough should be soft but stiff.
  4. Spread batter into prepared pan.  Sprinkle with cinnamon-sugar mixture.
  5. Bake 14-16 minutes or until center is set and edges are slightly golden.  Remove from oven.
  6. Soften frosting in can 10-15 seconds in the microwave.
  7. Allow bars to cool thoroughly before drizzling with softened frosting.  Let cool and cut into bars.  Store in an airtight container.  Makes 15-18 bars.
Now, breaking down the recipe;
Combine cake mix, eggs, oil, and vanilla...
And spread it in your prepared pan.  Grease that pan liberally!  Bake for about 16 minutes at 350 degrees F.
Combine your brown sugar and your cinnamon.  I advise you to not use all of it on the bars like I did.  The cinnamon sugar on top is really good, but all of it is WAY too much.  Save some for oatmeal!
Spread that cinnamon sugar mixture over your baked bars...
And then drizzle your softened frosting/icing/whatever.  You can make homemade or buy it in a can.  Here's a funny thing - Jewel-brand cream cheese frosting is actually vanilla frosting.  There is no difference.  So, I thought I was going to be frosting these bars with cream cheese frosting - but I wasn't.  But the vanilla tasted just as good!  (And if you know me, you'll know that I'll take vanilla over cream cheese any day.)
Doesn't that look awesome?  Now cut it into bars, let it dry, and EAT THEM ALL!!!!!
Enjoy, lovies!
-JJ

Wednesday, September 19, 2012

Oatmeal Raisin Cookies

More raisins!
I've discovered raisins again! :D

After that bread pudding, I realized that there were raisins in the pantry.  Raisins.  And I had no idea what do to with them.

Don't you remember when you were little and you'd get those little red boxes of raisins for a snack?  As far as snacks go, that was a so-so one, but it was infuriating to get those last raisins out of the box.  They would stick to the bottom of the box and little toddler fingers just aren't made for reaching like that.  They just aren't.

It was a great source of frustration for me.  Maybe that's why I'm a little loopy nowadays! xD I also hated the sticky feeling of raisins on my hands.  I could never wipe my hands enough after eating raisins.  So I began to not like raisins so much.  Stickiness = ickiness in my book.

But then I discovered chocolate-covered raisins at the movie theaters.  Those are seriously the best movie snack I've ever had ever ever.  They are SO GOOD.  And the dark chocolate ones?  I'll seriously buy a huge bag of those, pop on a mindless movie, and just chow those puppies down.

Well, that's what I'd like to do, but c'est la vie.

And then, shopping in the kiddie snack part of Target, I came across yogurt-covered raisins in those little red boxes.  So I had to buy them.  For myself.

And they're really good!  They're like healthier versions of the chocolate-covered raisins!  And I've found them in trail mixes and everywhere.

But back to regular raisins.

I've finally accepted them for what they are: really good in oatmeal cookies.  Normally, as a chocoholic, I'll take chocolate chip over oatmeal raisin any day, but that all changed back in June . . .

I was at a party where there were two kinds of cookies: chocolate chip and oatmeal raisin.  And after dancing my butt off, I was trying my hardest to avoid them.  Because they were very large cookies, and, despite all this baking I do, I would not like to become very large myself.

So there I was, avoiding those cookies, when they looked my in the eye and said, "Eat me."  I swear they talked.  I had no choice but to obey - to find that all the chocolate chip cookies were gone!  So I settled for an oatmeal raisin cookie and became addicted.

For serious.

And so I made Quaker's Vanishing Oatmeal Raisin Cookies - you know, that one recipe on the thing (can?  cylindrical box?) of oats that everyone knows.

I feel a Quaker history lesson on the tip of my tongue - or fingertips, since I'm typing - but I'll force it back down.  You've had to listen (or scroll past) enough of me already.

So here they are - and I promise you, it's very hard to not eat more than five.

Vanishing Oatmeal Raisin Cookies
REQUIRES SOFTENED BUTTER

1 3/4 sticks unsalted butter, softened
3/4 cup brown sugar, packed
1/2 cup sugar
2 eggs
1 teaspoon vanilla
1 1/2 cups flour
1 teaspoon baking soda
1 teaspoon ground cinnamon
3 cups oats
1 cup raisins

  1. Preheat oven to 350 degrees F.
  2. In a large bowl, cream butter and sugars.  Add eggs and vanilla.  Beat well.
  3. In a separate bowl, combine flour, baking soda, and cinnamon with a fork.  Gradually add to wet mixture, stirring well after each addition.
  4. Stir in oats and raisins.
  5. Drop by tablespoon-sized cookie scoop onto ungreased baking sheets.  Bake 8-10 minutes or until golden brown.
  6. Remove from oven and cool 1 minute on baking sheets before removing to a wire rack to finish cooling.  Store tightly covered.
The classic oatmeal raisin cookie in a nutshell:
Make your glorious batter and try not to eat it.

Plop onto your cookie sheets and try not to eat the adorable little dough balls.
Bake them and they turn into this beautiful thing:
Now you can eat it!  Enjoy!
-JJ

Saturday, September 15, 2012

Raisin Bread Pudding

Time for a confession - I don't like bread pudding.  Never have, never will.  It's just one of those facts of life that you take for granted.  Like gravity.  Or Sherlock.

But there was all this whole wheat raisin bread that I was never going to eat - because I've found a new breakfast food!  (Begin tangent!)

Scrambled egg whites.  Yes.

There's this whole debate about whether eggs are good for you or bad for you or whether you should eat the yolk or not, but I'm just like, well, there are egg whites in a carton - like, just pour and scramble - so that's what I'll eat for breakfast.  And it only takes like three minutes to heat, pour, scramble, and eat. It's really awesome, and it gets some protein into the beginning of my day.

I used to eat a slice of raisin bread for breakfast.  But that's not very nutritious, nor did it taste awesome.  Salt-and-pepper egg white scramble?  Yes, please.

So I had all this leftover raisin bread.  And what can you do with raisin bread?  Bread pudding.

And that doesn't tempt me at all, so I'm skipping dessert and being doubly healthy.

Which means you know I'm going to post something fattening next! ;)

And one more thing before the recipe - this is crockpot style!  Yes, we have a crockpot now!  So pop this in there, let it cook, and enjoy!

Raisin Bread Pudding
4-5 HOURS COOKING TIME

Pudding:
8 slices whole wheat raisin bread
4 eggs
2 cups milk
1/4 cup sugar
1/2 stick butter, melted
1/4 cup raisins
1/2 teaspoon cinnamon
  1. Grease slow cooker.  Cut bread into cubes and place in cooker.
  2. In a medium bowl, beat eggs and milk.  Add sugar, butter, raisins, and cinnamon and stir well.  Pour over bread cubes and stir gently with a wooden spoon.
  3. Cover and cook on High 1 hour.  Reduce heat to Low and cook 3-4 hours.  Make sauce while pudding just finishes baking.
Sauce:
1/4 stick butter
2 tablespoons flour
1 cup water
3/4 cup sugar
1 teaspoon vanilla
  1. Melt butter in a large saucepan.  Stir in flour until smooth.  Gradually add water, sugar, and vanilla.  Bring to a boil.
  2. Stirring constantly, cook 2 minutes or until sauce has thickened.
Serving:
  1. Serve bread pudding warm in individual bowls.
  2. Pour sauce over portions and serve.  Makes 6 servings.

Now, wasn't that easy?

To make it easier, here's the breakdown:
You've got your bread...
Now cube it!  I cut mine into ninths.
Combine the eggs, milk, butter, raisins, and cinnamon...
And pour over the bread cubes.  Cook 1 hour on High, then about 3 hours on Low.
Make your sauce and serve!
I've got to admit, that does look good.
Maybe I'll come around eventually... ;)
-JJ

Wednesday, September 12, 2012

Recipe Archive!

Well, because there are so many recipes on this blog and it's hard to find them all, I've created a new page - the Recipe Archive!  Now you can easily find the links to recipes by the type of goodie I've created. :) Be sure to check it out!  Just click at the top or here.

Saturday, September 8, 2012

House Cake Pops


Talk about a housewarming gift!


Original recipes for the win! :3

And yes, I did bring these to my friend's new home.  She moved away :( but I still keep in touch with her.

Anyhoo, if you knew me, you'd know that I jump at every chance to make cake pops.  Every chance - whether it be Christmas, St. Patrick's Day, or for my own parties.

And here are the results of another chance: house cake pops.

Okay, yeah, they do look like birdhouses.  They look a lot like birdhouses - because they're on sticks.  I hadn't thought of that before I'd already dipped all of the pops.  But, whatever.  If you try making these, you could just make them house cake balls and stick them in green/floral/whatever mini cupcake wrappers.

I am quite proud of these, actually.  I do declare my cake pop making and decorating skills are improving.  I probably messed up only one of these.  And then promptly ate it.

In case you're new to the cake pop making world, then I'll post the actual yellow cake and vanilla frosting recipes I use.  They are my go-to recipes, and work wonderfully - figures, they're from Bakerella!

True, they're both included in my cupcakes post, but now, in future cake pop posts, I can just link back here! ^_^

Now, without further ado, I will present you with the original recipe - and then go into a fairly detailed breakdown:

House Cake Pops
REQUIRES SOFTENED BUTTER
REQUIRES ROOM TEMPERATURE EGGS AND MILK
REQUIRES COOLING TIME (1-2 hours/overnight)
REQUIRES CHILLING TIME (3-4 hours/overnight)

Makes 40 cake pops

Cake:
3 cups flour
2 teaspoons baking powder
1/2 teaspoon salt
2 sticks unsalted butter, softened
2 cups sugar
4 eggs, room temperature
2 teaspoons vanilla
1 cup milk, room temperature
  1. Preheat oven to 350 degrees F. and grease a 9x13 inch pan.
  2. In a large bowl, whisk together flour, baking powder, and salt.
  3. In a separate large bowl, cream softened butter and sugar.  Add eggs, one at a time, stirring well after each addition.  Add vanilla and combine.
  4. Alternatively add flour mixture and milk, in this order: 1/3 flour mixture, 1/2 milk, flour, milk, flour.
  5. Spread into prepared pan and bake 35-40 minutes or until a toothpick inserted in the center comes out clean.  Let cool completely - this often takes overnight.
Frosting:
1 1/2 sticks butter, softened
1 teaspoon vanilla
3 cups powdered sugar
1-2 teaspoons milk, if needed
  1. In a large bowl, beat together softened butter and vanilla until combined.
  2. Mix in powdered sugar, one cup at a time, stirring well after each addition.
  3. Add milk if necessary to make the frosting more creamy.
Assembly:
10 full graham cracker sheets
1 Hershey's milk chocolate bar
1-2 bags Target white chips
40 lollipop sticks
Oil
Styrofoam block with holes for pops
  1. If there are any brown edges to your cake, cut them off.  Then crumble the remaining yellow cake into a large bowl.  Add frosting and stir gently with a wooden spoon until the mixture is fairly even.
  2. Form into 40 cake cubes, method demonstrated here.  Use remaining mixture to create 40 triangular prisms, pictured below.  Place triangular prisms on cubes, pressing slightly.  Place house cubes on a cookie sheet covered with wax paper and cover with plastic wrap.  Refrigerate overnight or until firm.
  3. Break graham cracker sheets into four sections, and break each section in half.
  4. Take 10 sections of a Hershey bar and cut into four pieces.
  5. Place a metal bowl over a saucepan of water and heat; make sure the water doesn't touch the other side of the bowl.  Drop in a few white chips - when they have melted you are ready to begin.
  6. Pour a small amount of oil in the bottom of the bowl and pour in some white chips.  Let melt and stir smooth.  TURN OFF THE HEAT.
  7. Dip lollipop sticks into melted white chips and then into the bottoms of the house cubes.  Refrigerate while you dip the rest of the sticks.
  8. Dip pops completely in melted white chocolate, brushing off excess with a toothpick.  Immediately stand in styrofoam block and add 2 graham cracker pieces to the roof and 1 Hershey's piece as a door.  Make finished cake pops one at a time - white chocolate will set up quickly.
  9. Continue dipping and decorating.  If more white chocolate is needed, turn on heat, add more oil, and add more chips.  Turn off heat once it has melted and continue to dip.
  10. Let pops harden completely before taking them anywhere or serving them.  They may be refrigerated, tightly covered, for up to 3 days, and frozen, tightly covered, for about 2 weeks.
Breaking it down:
So your house cubes will look like this.  You need the little prism-thingies so that the graham cracker roofs can go on easily.  They're pretty easy to form, but it did take me a few tries to get it right.  Just try to make them look like this:
And here are your graham cracker roofs.  IMPORTANT TIP: With your fingernail, try indenting where you want to break the graham cracker fourths in half.  They'll break much easier and you won't have to scrap (or eat xD) as many graham crackers that way.  You want 80 of these by the time you're done.
Now, on to the Hershey's bar.  Just cut the sections with a table knife.
In half...
And then in fourths - long ways.  So NOT like [][][][].  Those doors are too skinny then!  In half vertical, and then in half horizontal.
And make 40 of those.
Then dip your pops.  If you need help dipping, see my dice cake pops post.
Don't they look adorable when they're done!?
And if you want to make a display - I used styrofoam, green tissue paper, and black duct tape.  The other decorations are foam shapes glued on or toothpicked.
Have fun making these!
-JJ
Related Posts Plugin for WordPress, Blogger...