Friday, March 23, 2012

Happy Hunger Games!

I'm a Hunger Games fanatic.  I've written fanfics, done fanart, and I'm a rabid shipper to boot.  TEAM FINNICK!  (For those who don't have a clue what I'm talking about, read the series.  Seriously.)

In addition to loving a hypocritical teen book protesting and promoting violence as entertainment, I'm leaving for vacation tomorrow, bright and early at 5:30 - which, if you've traveled a lot in your life, ain't that bad.  6:00 flights kill me.

Then I'll be tanning in the U.S. Virgin Islands at Maho Bay Camps on St. John.  Not to brag or anything. XD

So, what I'm trying to say is, I won't be posting for a week or so.  But when I come back, I'll have loads of pretty pictures (hopefully including a few sunrises and a few Look Up-eligable pics) and maybe a review or two of the food there.  Plus a tan and plenty of new ideas for recipes and more! :D

Love,
JJ

Thursday, March 22, 2012

Crêpes Champignons

That's French for "Mushroom Pancakes."  Essentially.
Lo and behold, I've actually made good on my promise to go vegetarian!  And here, as I said it would be, is a recipe from the Cheese Factory Restaurant cookbook.  This isn't actually one of the dishes I've had there - or ever seen served there.  And I can understand why.  Be prepared for a very French (which translates to "lots of work") kitchen adventure that results in a totally-worth-it dish.  Just don't say I didn't warn you.
Note: This is the halved recipe, because you probably don't want to be making the restaurant-sized batch (which yields 35-40 crêpes).  And actually, the mushroom filling portion is only a third of the original, and it works out perfectly.  (Also, the measurements are slightly nicer.)

Also: What I did instead of following the directions is italicized.  It's easier, trust me.

Crêpes Champignons
REQUIRES CHILLING TIME
Crêpes:
3 large eggs
2/3 cups milk
1/3 cup half-and-half
1/2 cup water
1/2 teaspoon salt
1 cups flour
1 tablespoon butter, melted
1 tablespoon
1/8 cup brandy
1/2 tablespoon butter or a nice can of Pam

Mushroom filling:
2 1/6  cups whole milk or any milk
1 cup dried shiitake mushrooms (1 1/4 oz.), stems removed and discarded or fresh shiitake mushrooms,
     and you don't have to remove the stems
1 bay leaf
1/3 stick butter
1/4 cup finely chopped onion
1 pound sliced white button mushrooms (If you don't have enough, just use more shiitake mushrooms -
     that's what I did!)
1/2 tablespoon brandy
1/4 cup flour
1/3 teaspoon grated nutmeg or less
1 teaspoon salt or less
1/4 teaspoon ground white pepper or less - all these "or less"s are if you don't want as strong a mixture

Mushroom sauce:
1 cup mushroom filling (see above)
1/6 cup reserved shiitake-flavored milk
1/3 cup whole milk or any milk
1/6 teaspoon salt
4-6 whole white button mushrooms, medium to large with 1/2-inch stems or just the prettiest ones
1/3 tablespoon butter

A note before we delve into the directions: You don't have to be totally exact with the measurements.  If you are, I am awed.  If you aren't, you're like the rest of the human race.

Crêpes:
  1. Combine eggs, milk, half-and-half, water, salt, flour, melted butter, sugar, and brandy in blender or with hand mixer.
  2. Chill in refrigerator at least 2 hours.
  3. Heat nonstick skillet; add 1/2 tablespoon of butter and swirl it to coat the pan OR Pam your pan in between crêpes.  (Confused?  Learn how to make simple crêpes here.)
  4. Pour 3 tablespoons batter (or ladle it out until it looks right) into skillet, and tilt skillet to spread evenly.  Cook over medium heat for about 1 minute.  Flip crêpe, then cook until brown spots appear on the underside.  Remove and repeat with remaining batter, buttering/Pamming the skillet between each crêpe.
Mushroom Filling:
  1. Place milk, shiitake mushrooms, and bay leaf in a 2-quart saucepan.  Heat until almost boiling, the remove.  Cover and set aside for 20 minutes.
  2. Strain shiitakes and discard bay leaf.  Reserve mushroom-flavored milk.
  3. Mince shiitakes in a food processor using metal blade attachment.
  4. Heat 1 tablespoon butter in another skillet and add onions.  Sauté onions until translucent.
  5. Add sliced button mushrooms and cook over high heat, stirring frequently.
  6. Add shiitakes and brandy and cook 1 to 2 minutes.  Remove from heat and set aside.
  7. Melt remaining 2 tablespoons butter in a large saucepan.  Add flour and whisk vigorously.  Cook 2 minutes; stir constantly.
  8. Add all but 1/6 cup shiitake-flavored milk and whisk vigorously to incorporate flour.  Add nutmeg and bring to a gentle boil over medium heat; whisk until thickened.
  9. Cook 2 to 3 minutes longer and add mushrooms mixture. Stir until well blended.  Add salt and pepper as desired.
Mushroom sauce:
  1. Purée 1 cup mushroom filing, reserved shiitake milk, whole (or other) milk, and salt in a blender/food processor until smooth.
  2. Slice and sauté reserved mushrooms in butter; set aside for garnish.
Assembly:
  1. Fold crêpes in half, and then in half again, forming a triangle.  Fill the very top fold with 1 heaping tablespoon mushroom filling and place in serving dish.
  2. Cover with foil and heat in 350 degree oven for about 20 minutes.
  3. Reheat sauce in microwave or in a saucepan over the stove.
  4. To serve, place crêpe(s) on a plate and pour sauce over it/them, and garnish with reserved mushroom slices.
Lots of funky measurements and a huge number of directions.  Let's do this:

Crêpes:
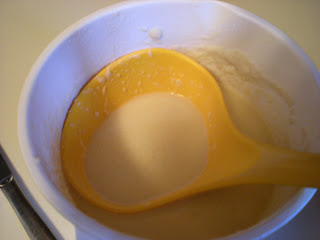
Mix eggs, milk, half-and-half, water, salt, flour, melted butter, sugar, and brandy with a hand-mixer...

Chill for 2 hours.  (I made the filling and sauce during this time.)  Pam your skillet...
...and ladle batter into skillet.
Tilt to spread evenly, cook for a minute, flip, and cook for another minute.
Remove and repeat.

Mushroom filling:
Heat milk, shiitake mushrooms, and bay leaf in a saucepan until almost boiling...
 Cover and set aside for 20 minutes.  (During which I did the rest of the filling.)  Strain shiitakes...
...and mince in food processor.
Heat butter and onions...
Sauté until translucent.
 Slice button mushrooms...
 ...and add to onions.
Add shiitakes...
 ...and brandy...
 ...and cook 1-2 minutes before removing from heat.
In a large saucepan, combine butter, flour, and shiitake-flavored milk, stirring constantly...
...until thick.  Add nutmeg.
Cook a few minutes and then add mushroom mixture...
Add salt and pepper as desired...
...and mix well.

Mushroom sauce:
Purée 1 cup of the mushroom filling, reserved shiitake milk, milk, and salt in a food processor...
...until smooth.
Slice reserved mushrooms and sauté in butter.

Assembling your crêpes:
Fold crêpes in half and in half again, forming triangles...
 Spoon a generous tablespoon of mushroom filling into the top fold of each crêpe...
...and place in a serving dish.  Cover with foil...
 ...and heat in a 350 degree oven for about 20 minutes.  Warm sauce in microwave, and spoon over crêpes when they're done.  Add a reserved mushroom slice as a garnish and you're all set!
These are delicious and definitely worth all the work. :)
-JJ

Wednesday, March 21, 2012

St. Patrick's Day Cake Pops


Happy belated St. Patrick's Day!

And, with a lotta love of cake pops, St. Pat's Day spirit, and a recipe from Love From The Oven, I now present to you... St. Patrick's Day Cake Pops!  These are made with green velvet cake, vanilla frosting, white chocolate, and decorated with sprinkles.  However, I couldn't find St. Patrick's Day themed sprinkles anywhere around me, and I was running out of time to make these, so I just used sugary sprinkles instead.

But before the recipe and breakdown, I've got to say a few things.  Yeah, yeah, whatever, scroll past this part if you want... or dare.

First of all, Happy St. Patty's Day several days late.  What with parties and everything, I always seem to be a few steps behind.  So, if you're looking at this and it's less than half a year to March 17th, then make this next year!

Second, I learned quite a few things while making these, which I will now proceed to tell you:
1. DON'T USE STORE-BOUGHT FROSTING.  It tastes really good, and I was happy with the way the cake balls tasted, but the cake will then crumble apart.  Or, go ahead and follow my exact recipe - and then follow my exact directions, or you'll end up with half a batch of cake pops instead of a mostly-full batch.
2. Never skip oil when melting white chocolate!  It will save your life... and your pops.
3. Take the time to let the cake cool before you crumble it - otherwise you get mush.
4. Also take the time to let your cake pops chill in the refrigerator for a day.  They're easier to dip and don't die as often.
5. Brushes are definitely a worthwhile investment.  Check it out down below if you don't know what I mean.

Thank you for your time - your pops will thank you, too.  And now, without further ado, the recipe.

St. Patrick's Day Cake Pops
2 eggs
1 cup oil
1 cup buttermilk
1 tablespoon vinegar
1 teaspoon vanilla
1 oz. green food coloring
2 1/2 cups flour
2 cups sugar
1 tablespoon cocoa
1 teaspoon salt
1 teaspoon baking soda
1 can vanilla frosting*
24 oz. bag white chocolate chips
oil as needed
50 lollipop sticks
styrofoam block

*If you want to follow my exact, rather confusing directions, then use this kind of frosting (I used this frosting).  Otherwise, use cream cheese frosting like the original recipe from Love From The Oven stated. I just don't like cream cheese frosting; hence, the vanilla.
  1. Preheat oven to 350 degrees F.
  2. Whip eggs in a medium bowl.  Add oil, buttermilk, vinegar, vanilla, and food coloring.  Mix well.
  3. In a large bowl, combine flour, sugar, cocoa, salt, and baking soda.
  4. Pour wet mixture into dry; mix thoroughly.  Pour into a nonstick 9x13 pan.  Bake for about 40 minutes.  Insert a toothpick near center of cake and bake additionally if it doesn't come out clean.
  5. Let cake cool.
  6. Cut into several pieces.  Crumble into a large bowl.
  7. Spoon in frosting, then mix gently but thoroughly.
  8. Form cake balls with hands or a large cookie scoop.  Place on baking sheet and freeze for 15 minutes.
  9. Melt white chocolate chips and oil in a metal bowl over a saucepan of simmering water.
  10. Dip lollipop sticks into chocolate and then press into centers of cake balls.
  11. Refrigerate pops for a day.
  12. Set up the white chocolate melting bowl again.  Take pops out, three or four at a time, and brush white chocolate onto the pops.  Shake excess chocolate off by tapping your wrist.
  13. Pour a small bowl of sprinkles over your cake pop, rotating the pop to get even sprinkle coverage.  Have a plate or another bowl catch excess sprinkles, and pour over pop back into the original bowl.  (The reason you do this is because you cannot dip these pops in sprinkles!  They will fall apart.)
  14. Stick pop into styrofoam block to harden, and repeat with remaining pops.  Makes 50 cake pops.
And again, if you use cream cheese frosting, you probably don't have to follow all these little rules that I'm posting.  Stupid store-bought frosting...

Breaking it down:
Crack your eggs into a medium bowl...

...and whisk until smooth.
Add oil, buttermilk, vinegar, vanilla, and, obviously, food coloring...
...and stir.
In a large bowl, combine flour, sugar, cocoa, salt, and baking soda...
Mix thoroughly.
Pour the wet into the dry...
...and stir well.  Beautiful, huh?  And sooo green!
Pour batter into a nonstick pan...
...and bake for about 40 minutes.  (The reason I say "about" is because the original recipe used round cake pans... so therefore, I estimate.  Use the toothpick trick, though.  Seriously.)
Let cake cool, then cut into pieces...
Crumble into a large bowl...
Then add your frosting...
...and mix well.
Form into cake balls...
...and freeze for 15 minutes.  Then dip your lollipop sticks into white chocolate and oil and stick them in your cake balls.  Refrigerate these for a day/overnight.
After a day/night has passed, set out your sprinkles...
...and melt your white chocolate chips and oil again... (see my brush?)
Then brush chocolate over your pops and decorate with sprinkles to your heart's content!
Mine came out rather lumpy, as they tend to do when you have to chill them upside-down on a baking sheet, but they tasted awesome.  So, as long as you make your own frosting or use a different one, yours will look pretty and taste great!
You can set these up on a styrofoam block covered in wrapping paper, as shown above.  Carry it carefully to the party you've been invited to and everyone will love them!  (I did just that and they were gone in less than five minutes.  One disappeared before I even got through the door of the house! XD)  Ribbons are also a cute touch. :)
Happy St. Patrick's Day again!
-JJ
Related Posts Plugin for WordPress, Blogger...